Archive

Fireplace Paint Removal Update

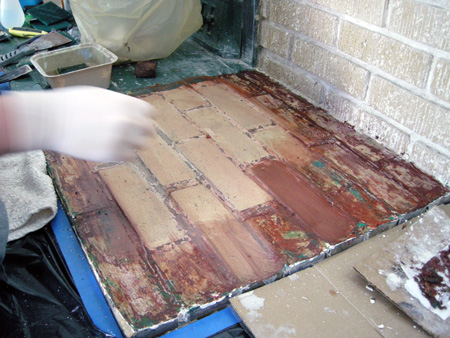
We finished paint removal with PeelAway on the brick and tile of the fireplace last night. Well, or at least the front. I suppose we didn’t do the thin strip on each side.

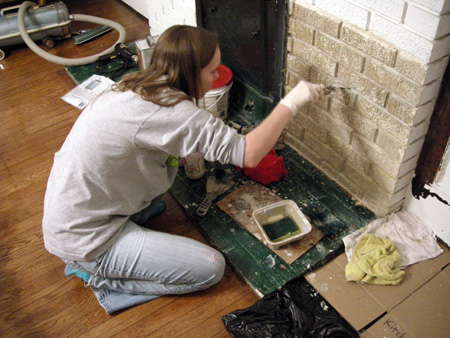
So this is the result we got after using the PeelAway one time. You can tell how we did it in sections because the PeelAway hardened more at the edges. You can also tell we were in a hurry in the top left corner! We removed it, but had to leave to go to a BeltLine meeting and weren’t able to do our usual thorough cleaning. As we progressed with each section we tried various methods of after-PeelAway-cleaning. Initially we used the sponge method and lots of towels and switching out water. Towards the end we used a spray bottle and a dust pan to catch the drippings. Then we’d use a little nylon brush to rub off the remains in the cracks as best as possible, as well as our metal scrapers to get things out of the cracks.

Using the PeelAway on the extremely textured brick versus on the flat tile was definitely a different experience. The texture takes a lot of work because there are just so many places the paint is able to stick to. The flat surface was really rather quick. The paint never truly “peels away” like the product title seems to indicate. If you think you can remove the waxy paper with your pinky and all the paint will just magically stick to it and be gone then well…perhaps you should either not remove the paint, or hire someone to do the work for you. This will definitely still require some scrubbing and cleaning and work, but I think it helped a lot and we were probably able to cover a larger area quicker than we would have with the KleanStrip. Obviously the more textured the area, the harder the work will be. So overall we’re very happy with the results from the PeelAway.

Result after one-time PeelAway use:
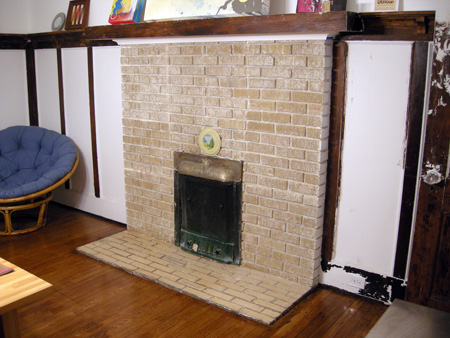
Fireplace after PeelAway

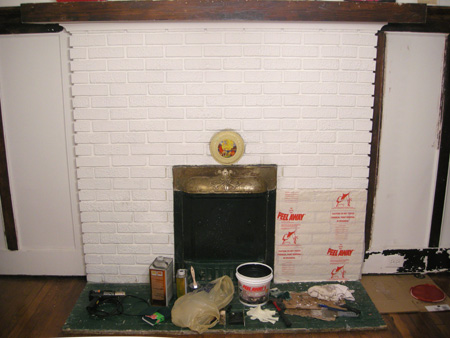
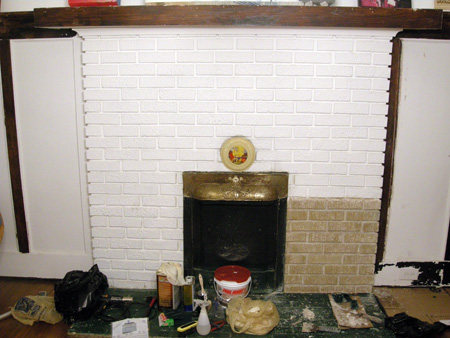
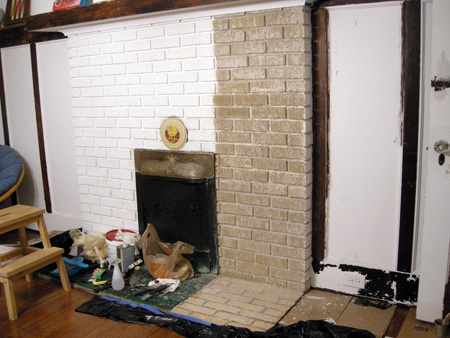
The fireplace when we bought the house (where someone had gone white-paint-happy, and before we refinished the floors):
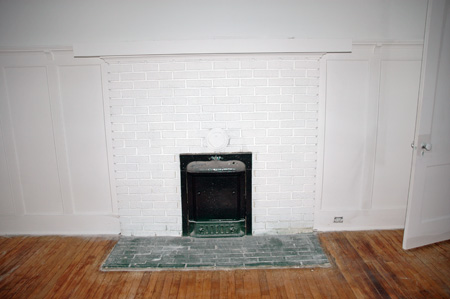
Fireplace before PeelAway

Thankfully my sister is coming in town for a visit today, so it will give our fingers time to recuperate and will give our mind some time off because otherwise we may have started getting burned out on the project. (There are only so many days in a row you can work on the same thing before you get worn out and need a break.)

So the next steps will be to apply the PeelAway on the metal cover. We have worked on it with KleanStrip on a previous occasion, so we already know it should be a brass cover. We’re curious though if we will uncover any additional details! (We’ll show what we’ve uncovered this far when we work on it some more.) Then we have to also remove the paint from the brick on each side of the fireplace. Lastly we’ll probably use KleanStrip to go back and try to remove some of the leftover paint, like where the seams show, or where we ran out of time to properly clean the area. But we’re really excited about how good this looks already!

Posted in Before and After, Our Bungalow, Photos, Westview Bungalow | Tagged , , , , , , , , , | Comments Off on Fireplace Paint Removal Update

Continuing Peel Away Process on Fireplace

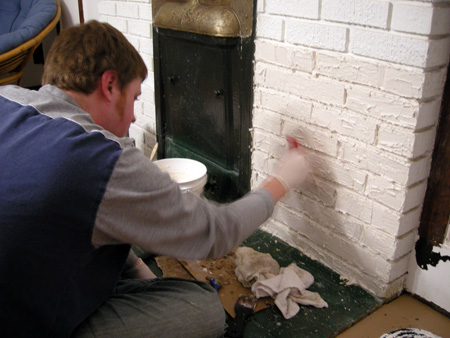
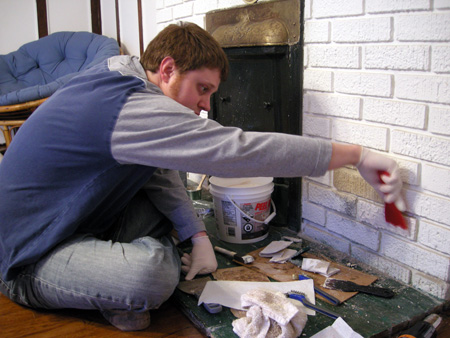
Our fireplace paint removal with Peel Away has continued over the last week. In order not to get overwhelmed we are tackling one little section at a time. Patrick is applying the Peel Away…

Applying Peel Away

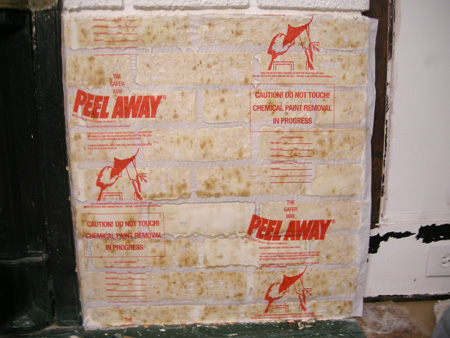
The waxy paper is applied. Now we wait…

Fireplace with Peel Away

As the hours pass it seems as though the paint color tries to escape towards the waxy paper. It’s interesting to note the two bricks we’ve previously already removed paint from have less of the colored blotches…

Fireplace with Peel Away close-up

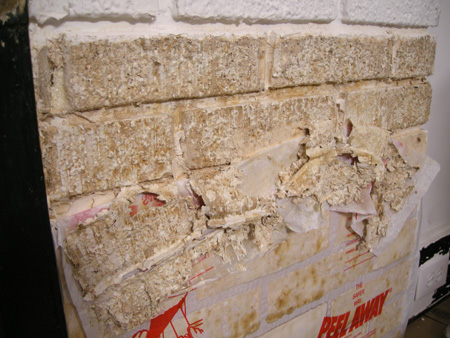
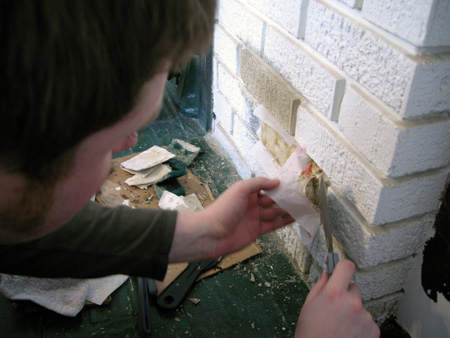
With metal scrapers we try to peel away the paint with the paper as best as we can. Since this brick is so extremely textured a good amount remains behind in the gaps.

Removing Peel Away

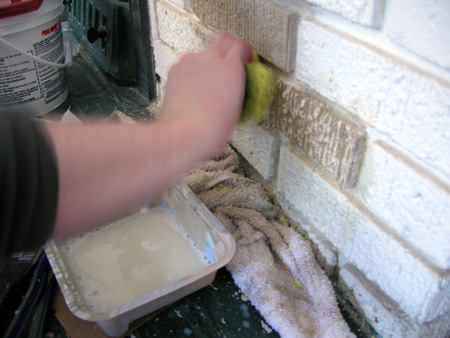
We try to wash off the excess paint and chemical as best as we can with a sponge, nylon brush, towels, and lots of water changes. After that I tackled the brick with a metal scraper to get off areas that are softened because of the water but sticking too much for the sponge.

Removing Peel Away

Our first block complete! Can’t you picture the whole beauty already?
Removing Peel Away

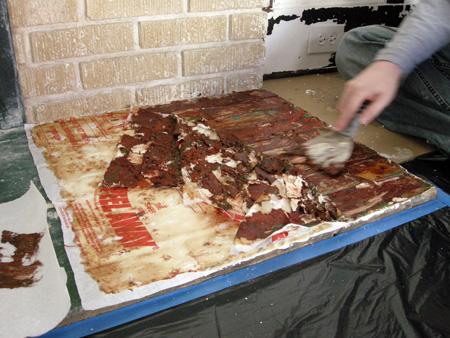
Next we decided we wanted to figure out what surprise lay ahead of us for the fireplace hearth. After the overnight waiting period we started to remove the multi-colored mess.

Removing Peel Away

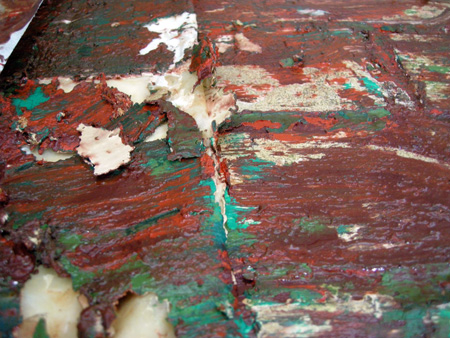
I had to take a close-up of the color mess. Will you look at those colors?! Obviously we knew the top coat of paint was a dark green, but underneath that was a BRIGHT red paint. It may be a little hard to tell in the photo because the bright red is already mixed in quite a bit with the other colors, but believe me, it was quite red. I think many home restorers will have stories about the colors they find when digging through the layers of paint. We’ve had our share of pastel pink and pastel green in the bathroom, and a pastel yellow in the kitchen. All those appeared to be older colors. Then we found a bright blue in our bedroom, and now this neon red in the dining room – my guess is 70s? I seem to get this picture that our house used to be bright circus colors!

Smeared Peel Away paint

After some sponge washing the tan tile is starting to appear.

Cleaning off Peel Away

And here is where we’re at after four Peel Away sections. I’m loving it already!!

Partially removed paint

Posted in Our Bungalow, Photos, Westview Bungalow | Tagged , , , , , , , , , , , | Comments Off on Continuing Peel Away Process on Fireplace

Fireplace Paint Removal with Peel Away

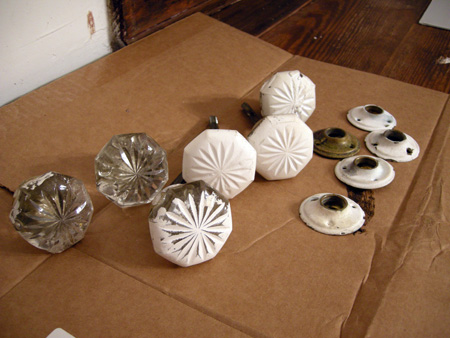
Our socially uneventful weekend proved itself to be very helpful in the house project department. Patrick has been eager to remove some paint from the dining room fireplace – initially to my dismay because it would mean another started project while the old ones sit unfinished. I made him start on a lower brick so it could be hidden by our plants if it should become one of our many unfinished projects. While Patrick equipped himself with our regular Kleanstrip chemical paint remover I decided to tackle the painted crystal doorknobs. (Patrick had pulled them out on one occasion and then they laid there untouched for weeks before we had to tuck them back away for a party.)

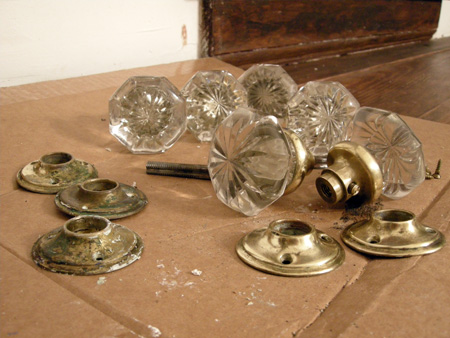
My Friday and Saturday nights were pretty successful with the paint removal on the doorknobs. I applied the chemical first, removing the paint as best as I could, then I put some Goo Gone gel on a paper towel and wiped any remaining paint off. Previously I actually only removed the paint with the Goo Gone, but this time I decided to try it this way. Then I polished the brass parts with steel wool. (The brass on the right was polished, the brass on the left still needs to be polished.)

Painted glass door knobs

Door knob paint removal

Patrick’s Friday and Saturday nights on the other hand were a little more frustrating. After seemingly endless applications of the chemical followed by removal with a nylon brush it felt like relatively little progress was achieved. After the first chemical application the white paint on the brick got into the fresh chemical in the cup, so every time a new layer of chemical was applied it just felt like a new layer of white paint was reapplied to the brick via the chemical. As a result we had a hard time figuring out when we had actually reached the brick and what color it was supposed to be. So after two nights we think we got close to reaching the brick…

Peel Away trial

…but we also realized we’d be pulling out each other’s hair if it would take us this long for each brick.

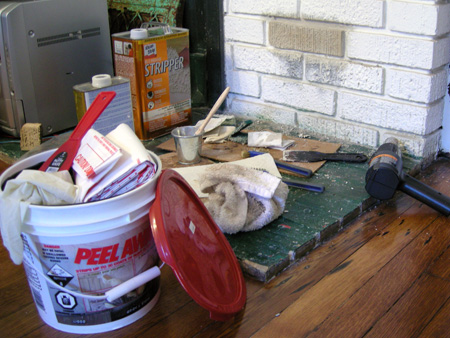
In our paint removal quests we have often come across websites talking about Peel Away. The reviews always seemed mixed. Some people got great results, others were less than happy. Since we’ve been pretty happy with the results from the Kleanstrip we didn’t feel the need to go out of our way to search for Peel Away, but at this point in the brick paint removal process we revisited the idea. So on Sunday we found that Sherwin Williams stores sell it and picked up the last bucket they had. (I don’t know if that means the product is flying off the shelves or we’re the first people that bought it?) Pretty much everything you need is contained in the bucket – the goo, a pair of gloves, the applicator, and the waxy paper to cover the goo with. The one thing that was not supplied but the directions recommended was to use a nylon brush to get into detail areas. Of course we didn’t read this until after we got back home, so it didn’t do us any good.

Peel Away supplies

The directions recommended to do a test area (as always!), which unfortunately meant up to a 24 hour waiting period! We had to force ourselves to be patient and obey, so Patrick applied the fun looking Coolwhip goo to one brick with the applicator.

Peel Away paint removal

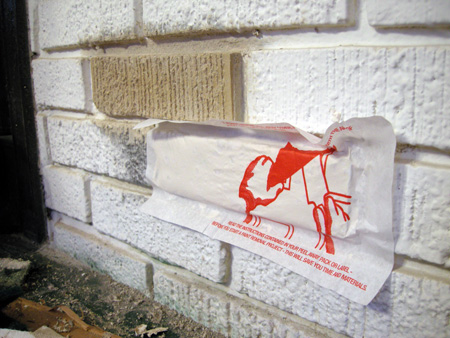
Then the waxy paper was applied over it.

Peel Away paint removal

The instructions said the Peel Away can be removed after 12 to 24 hours and you’ll know when the goo feels like workable clay. After 20 hours it felt right, so we started to take it off with a metal scraper.

Peel Away paint removal

After scraping away remaining residue with the metal scraper as best as possible we used a wet nylon brush to get additional paint out of the creases. We then used a wet sponge to wash off the paint and patted it dry with a towel. We also put a towel on the ground to catch all the wet sponge runoff. Then we repeated this process a number of times.

Peel Away scrubbing

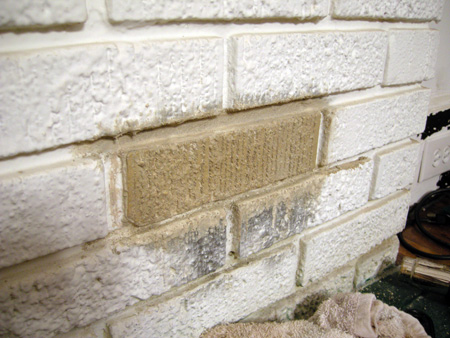
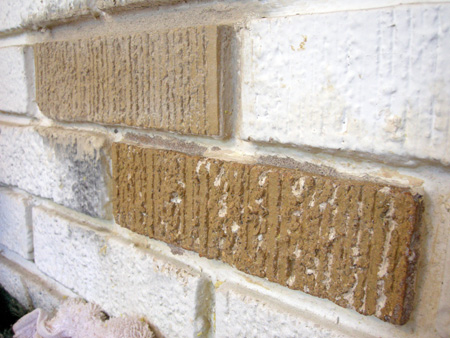
Here is the result of our test Peel Away brick! The top one is the two day Kleanstrip chemical brick, but while it looks nice in the photo it was still covered in tan paint. The bottom one is the Peel Away brick. We were pretty pleased with the results considering the time and effort involved compared to the other one.

Brick after Peel Away

So now we’re ready to tackle a larger area!

Posted in Our Bungalow, Photos, Westview Bungalow | Tagged , , , , , , , , , , , , , | Comments Off on Fireplace Paint Removal with Peel Away

Brick Path

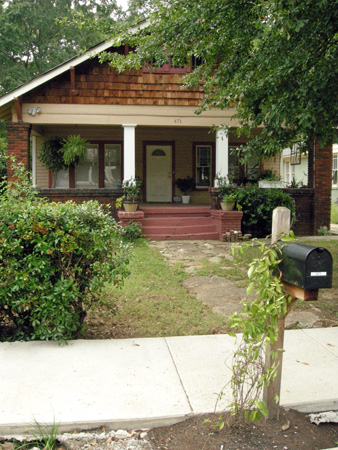
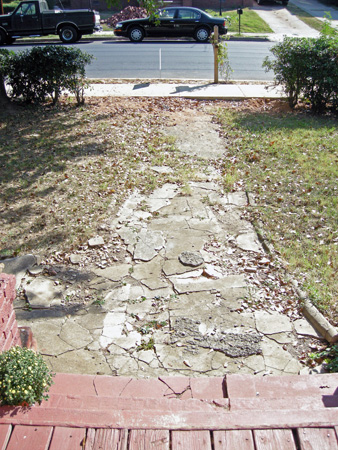
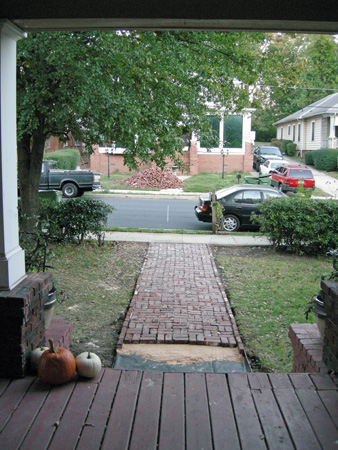
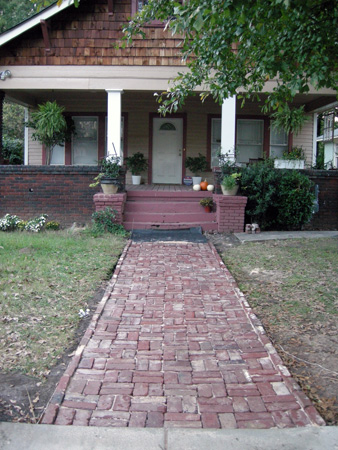
We’ve been working on a pretty exciting project lately…our front path! Although we still have a ways to go as far as the exterior of the house goes I think the path has been one aesthetically unpleasing sight that really pulled the rest of the house down in curb appeal. The path seemed to consist of more grass/weed patches than concrete! It has really been quite an embarrassment. Well thankfully we finally got started on changing that!

Back in May we posted about luck coming our way when we ran into acquaintances who were participating in the Inman Park Tour of Homes where they had built a wine cellar out of old bricks (from an early 1900s building that was torn down somewhere along Peachtree Street) and were generous enough to give us their leftovers. Just what we had been hoping for!! They had been sitting in our back yard since then and we had been waiting for the street and sidewalk construction to be done before we’d get started on our walkway. (Because we knew they were going to raise the sidewalks to put in curbs so there was no point in guessing how high to build our walkway until the new sidewalk would be done.) We were debating about hiring the same guys that repointed our brick to build the path, but then ended up deciding that we’d give it a try ourselves.

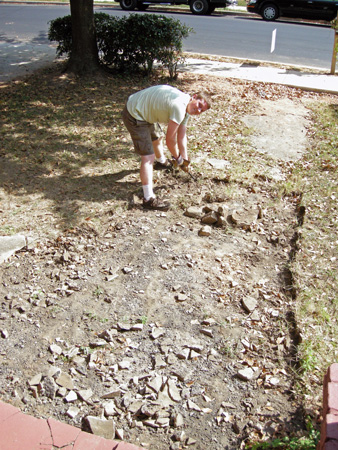
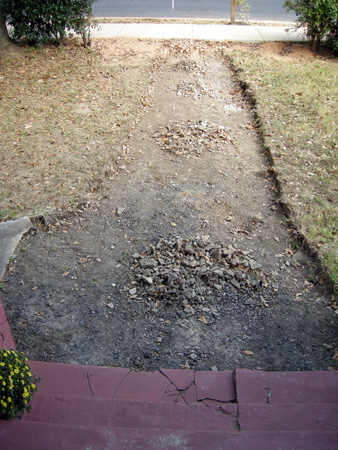
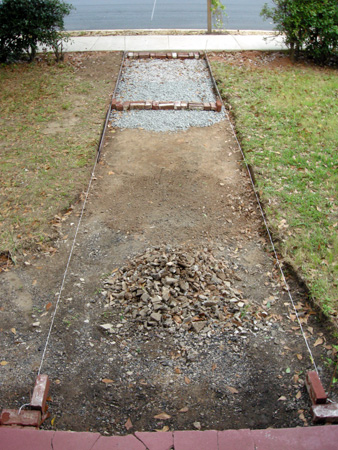
Since half of the path was already in crumbles it wasn’t too hard to pull it up. When we talked to our brick repointing guy he was determined to use cement in some way or another. We were determined not to. So we got some metal edging pieces to hold the bricks in place instead. Here are some photos of how far we’ve made it. We’re not done all the way, but I wanted to share how far we’ve gotten because I think it looks 100 times better already (even not being done, haha).

Our “lovely” crumbled path:

Front path before

Front path before

Tearing out the concrete:

Tearing out front path

Tearing out front path

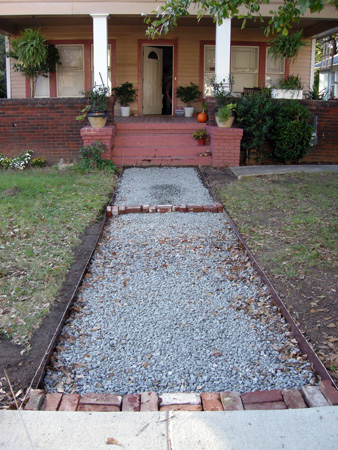
Putting down gravel so there will be good drainage:

Laying out front path

Gravel path

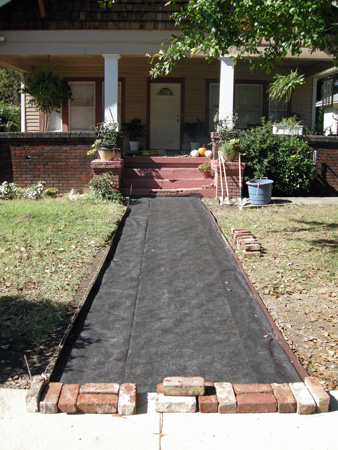
Landscaping fabric to (hopefully) prevent weeds from growing:

Front path landscape fabric

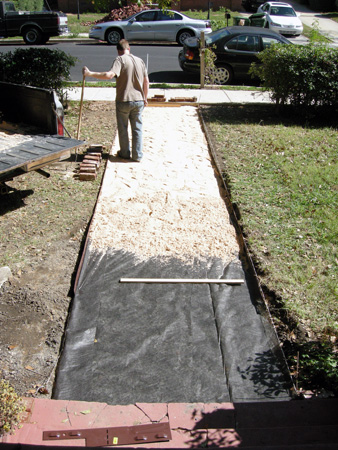
Putting down sand:

Front path sand

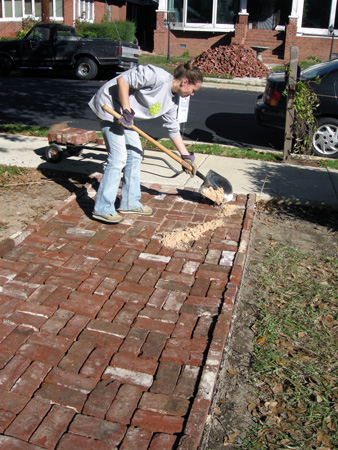
We’ve laid out some of the bricks and are sweeping sand between the cracks to keep the bricks from shifting around:

Front path brick and sand

Our progress up until now:

Front path brick

Front path brick

Posted in Gardening, Our Bungalow, Photos | Tagged , , , , , , , , , , , | Comments Off on Brick Path

Repointing The Brick

This is a project that finally feels really accomplishing. Not that we technically lifted much of a finger to do it. But it’s definitely a bigger house improvement project – getting the foundation’s brick repointed!

Two houses over from us a house had sat empty ever since we bought our house. It was a cute enough bungalow…granite foundation, several built-ins (kitchen, dining room, and living room), a number of fire places, and even some original light fixtures! Though Patrick and I have been able to see past the neglect we realized it was still a house in need of some TLC. Especially the granite foundation was looking a bit sad where blocks looked very loose. Finally after all this time of sitting there a “For Sale” sign appeared. It sat on the market for months, and just before we went out of town someone bought it. When we returned from vacation we were thrilled to see they had worked on the granite mortar – and it looked great! The workers also continued with the brick foundation on the back of the house, so one day I decided to walk over there and inquire who had done it. We have long realized that our brick foundation was in need of some new mortar as well, so we went ahead and got a quote.

We had previously researched about repointing bricks. Unfortunately the results weren’t so fun. Basically from what I’ve read it comes down to this: These older houses were built with a softer mortar. Shortly after the bungalow timeframe harder mortar mixes were introduced. All this eventually means that using the harder mortar can damage the old bricks. So what does this mean? “We need to get our mortar analyzed for some $500?! And that doesn’t even include the labor or figuring out how to get the materials for the analyzed results?!” I’m all for trying to do things the right way and respecting historic aspects, but we had to draw the line somewhere. Some of the bricks already had new mortar slapped on, so was this such a bad decision anyway? I’m trying to make myself feel better here – I hope the old-brick-and-mortar gods forgive me one day.

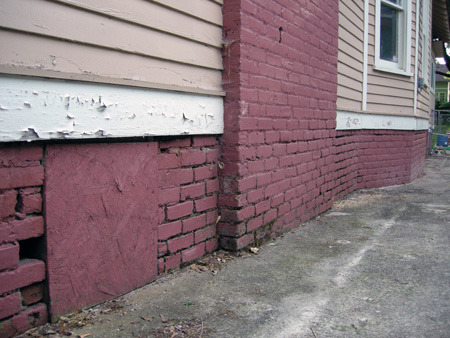
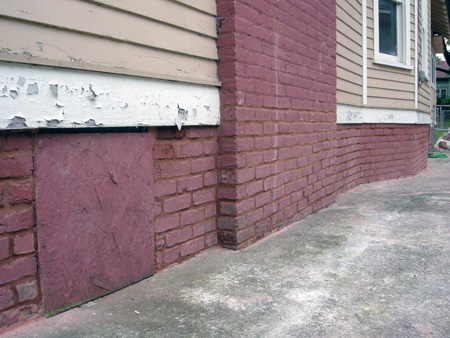
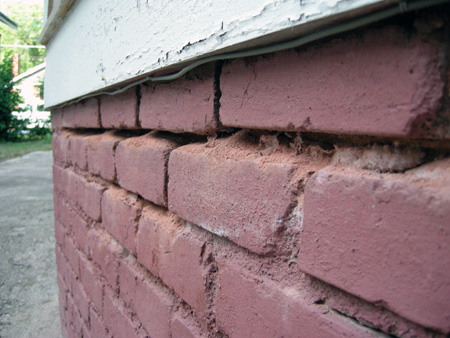
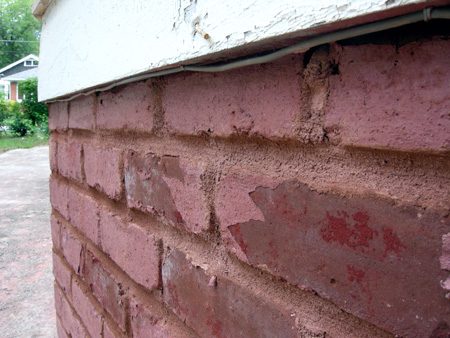
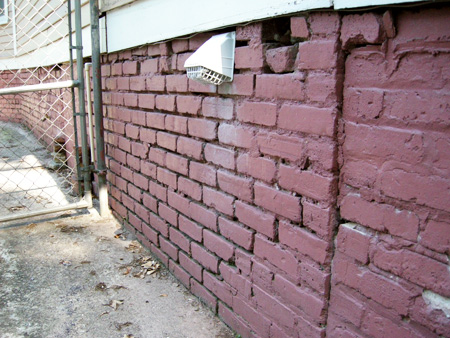
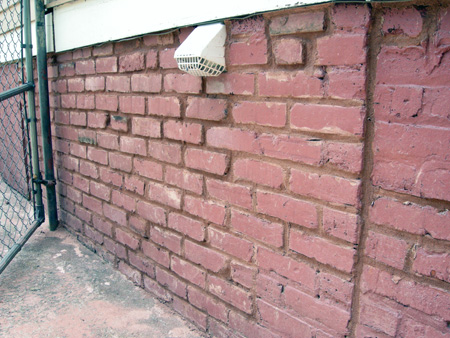
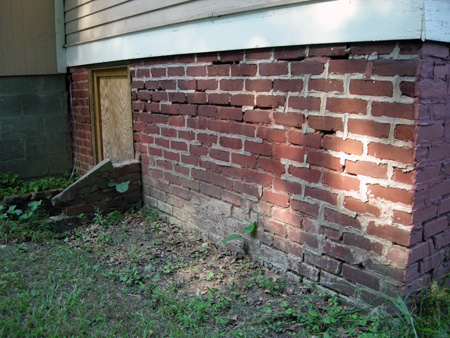
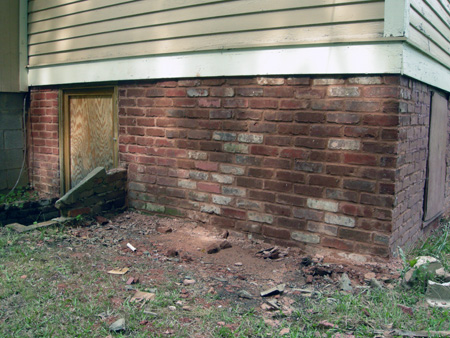
So over the last few days we’ve had Victor and his crew work on repointing our bricks. Since the old crumbling mortar (can you even consider it crumbling anymore when it’s really just turned into sand?) was a reddish color we opted to die our mortar with the “Terra Cotta” liquid cement color. On most of the house they simply scraped out the loose mortar and replaced it with the new one. However in two locations the condition was so bad (they were able to pick out the bricks by hand!!!) that they rebuilt the entire section. We think they did a great job and are so excited how much better our foundation looks!! (Now we just need to get rid of that god-awful pink color!)

Re-pointing brick before

Before

Re-pointing brick after

After

Re-pointing brick before

Before

Re-pointing brick after

After

Re-pointing brick before

Before

Re-pointing brick after

After

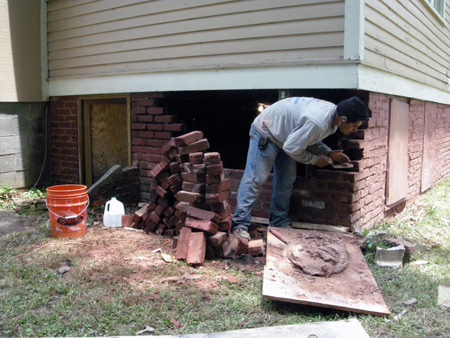
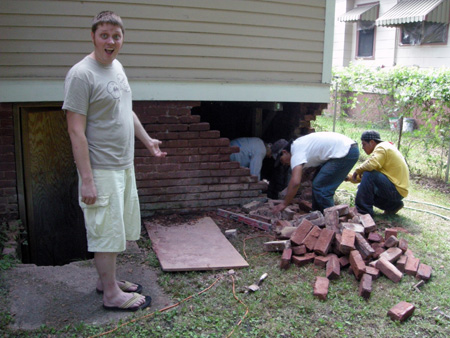
This was one of the walls they entirely rebuilt. Imagine how scared we were when they just picked out bricks near the supporting corner by hand!

Re-pointing brick before

Before

Re-pointing brick

Patrick going “”Can you believe that”?!”

Re-pointing brick

In the process

Re-pointing brick after

After

Yay for another completed project! :)

Posted in Before and After, Our Bungalow, Photos | Tagged , , , , , , , , , | 1 Comment