Archive

Fireplace Paint Removal with Peel Away

Our socially uneventful weekend proved itself to be very helpful in the house project department. Patrick has been eager to remove some paint from the dining room fireplace – initially to my dismay because it would mean another started project while the old ones sit unfinished. I made him start on a lower brick so it could be hidden by our plants if it should become one of our many unfinished projects. While Patrick equipped himself with our regular Kleanstrip chemical paint remover I decided to tackle the painted crystal doorknobs. (Patrick had pulled them out on one occasion and then they laid there untouched for weeks before we had to tuck them back away for a party.)

My Friday and Saturday nights were pretty successful with the paint removal on the doorknobs. I applied the chemical first, removing the paint as best as I could, then I put some Goo Gone gel on a paper towel and wiped any remaining paint off. Previously I actually only removed the paint with the Goo Gone, but this time I decided to try it this way. Then I polished the brass parts with steel wool. (The brass on the right was polished, the brass on the left still needs to be polished.)
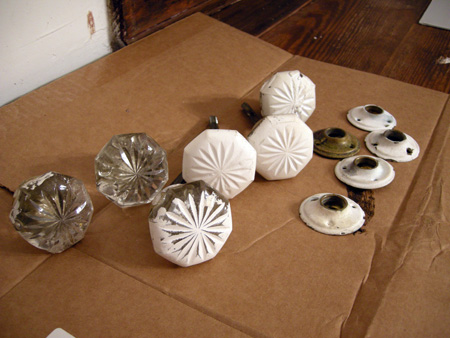
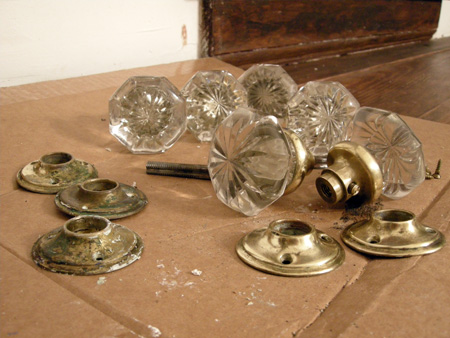
Painted glass door knobs

Door knob paint removal

Patrick’s Friday and Saturday nights on the other hand were a little more frustrating. After seemingly endless applications of the chemical followed by removal with a nylon brush it felt like relatively little progress was achieved. After the first chemical application the white paint on the brick got into the fresh chemical in the cup, so every time a new layer of chemical was applied it just felt like a new layer of white paint was reapplied to the brick via the chemical. As a result we had a hard time figuring out when we had actually reached the brick and what color it was supposed to be. So after two nights we think we got close to reaching the brick…
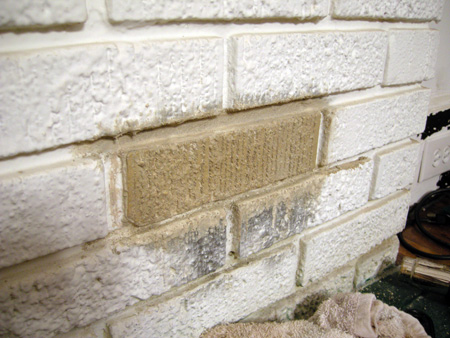
Peel Away trial

…but we also realized we’d be pulling out each other’s hair if it would take us this long for each brick.

In our paint removal quests we have often come across websites talking about Peel Away. The reviews always seemed mixed. Some people got great results, others were less than happy. Since we’ve been pretty happy with the results from the Kleanstrip we didn’t feel the need to go out of our way to search for Peel Away, but at this point in the brick paint removal process we revisited the idea. So on Sunday we found that Sherwin Williams stores sell it and picked up the last bucket they had. (I don’t know if that means the product is flying off the shelves or we’re the first people that bought it?) Pretty much everything you need is contained in the bucket – the goo, a pair of gloves, the applicator, and the waxy paper to cover the goo with. The one thing that was not supplied but the directions recommended was to use a nylon brush to get into detail areas. Of course we didn’t read this until after we got back home, so it didn’t do us any good.
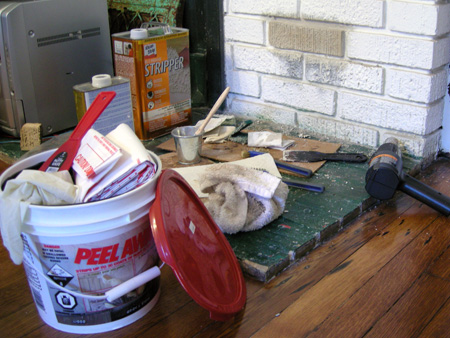
Peel Away supplies

The directions recommended to do a test area (as always!), which unfortunately meant up to a 24 hour waiting period! We had to force ourselves to be patient and obey, so Patrick applied the fun looking Coolwhip goo to one brick with the applicator.
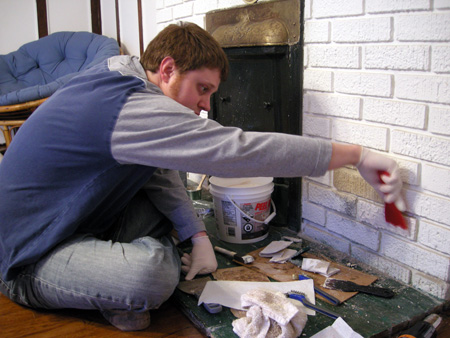
Peel Away paint removal

Then the waxy paper was applied over it.
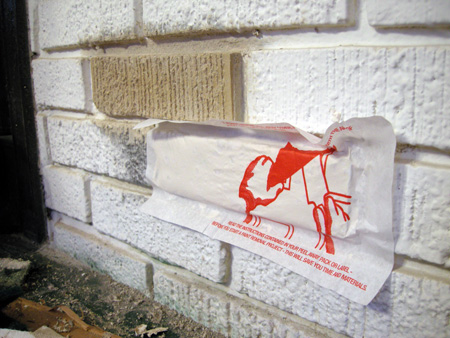
Peel Away paint removal

The instructions said the Peel Away can be removed after 12 to 24 hours and you’ll know when the goo feels like workable clay. After 20 hours it felt right, so we started to take it off with a metal scraper.
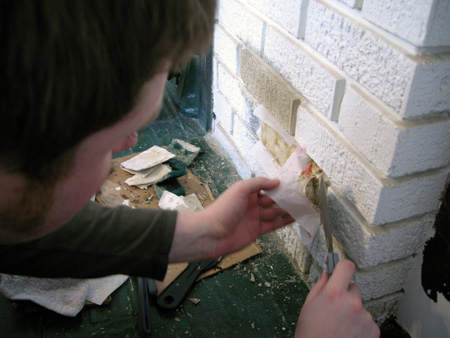
Peel Away paint removal

After scraping away remaining residue with the metal scraper as best as possible we used a wet nylon brush to get additional paint out of the creases. We then used a wet sponge to wash off the paint and patted it dry with a towel. We also put a towel on the ground to catch all the wet sponge runoff. Then we repeated this process a number of times.
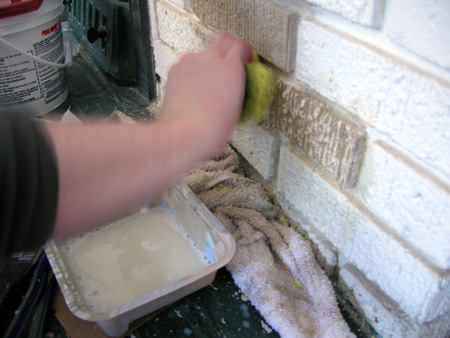
Peel Away scrubbing

Here is the result of our test Peel Away brick! The top one is the two day Kleanstrip chemical brick, but while it looks nice in the photo it was still covered in tan paint. The bottom one is the Peel Away brick. We were pretty pleased with the results considering the time and effort involved compared to the other one.
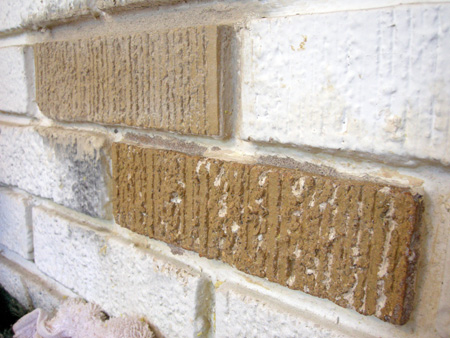
Brick after Peel Away

So now we’re ready to tackle a larger area!

Posted in Our Bungalow, Photos, Westview Bungalow | Tagged , , , , , , , , , , , , , | Comments Off on Fireplace Paint Removal with Peel Away

Living Room / Guest Room Door

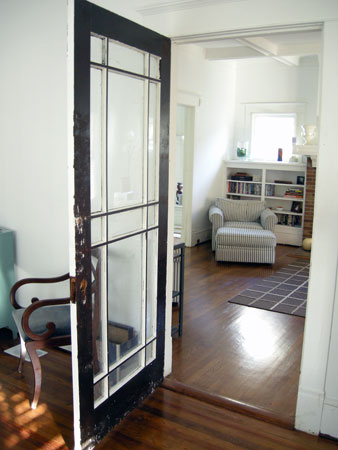
One of the drooling parts about our house has always been the door between the living room and guest bedroom. The design matches the exterior windows, the kitchen butler’s pantry, and the coffered ceilings. And of course beautiful unique window designs like that are hard to come by these days.

Bedroom/Parlor Door

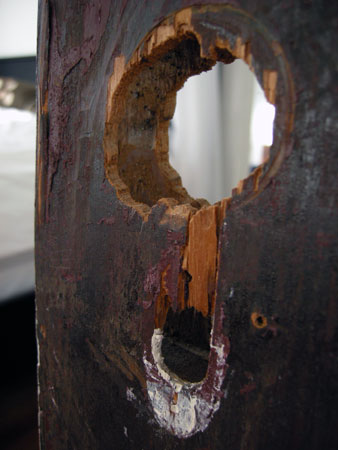
We had worked some on the door in March and April before friends and well as my parents were coming to visit. The fact that there was a door at all was somewhat of a luxury at that point. The fact that the door should be able to close wasn’t even on our minds yet. Well, of course for our visitor’s sake we wish we could have provided a closing door, but we just weren’t at that point yet. We have thought about what to put there since, and for a while were intrigued by the Eastlake door set. Though at $182 after shipping we haven’t exactly jumped on the “deal” and I’ve told Patrick we should ask for it for Christmas or something. The exciting part about the Eastlake set from Rejuvenation was also that they offered it for modern “holed” doors. Though our door is anything but modern it has sadly been badly butchered over the years. When we bought the house someone had removed the original mortise door set and carved out a hole to fit a modern door set in it.

Bedroom/Parlor Door Mortise

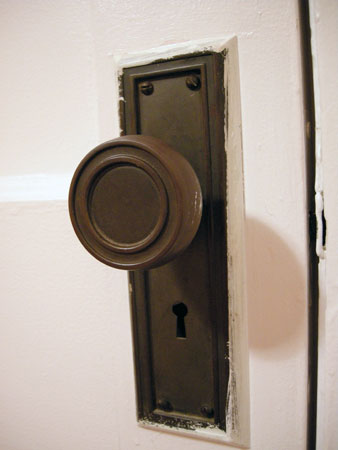
When we were in Chicago over the weekend we stayed with a friend in a cute old apartment in Rogers Park. The apartment had some really cool door knobs that we hadn’t seen before, but the design seemed perfect for our door and the style in the remainder of the house. Though the Eastlake design is very cool it also seems to lean towards the late Victorian-era style. The design of our friend’s door handles just seemed to fit better with the lines of the windows in our house. (Just to note: our friend didn’t paint the door.)

Historic Door Handle

We joked with her that she would come back from work one day and she would find a cheap door set on one of her doors. Now that we’re back home we’re on a mission to find this style door knob! The unfortunate part is that we don’t know what the name of the style is – which doesn’t exactly help. I found one style on Rejuvenation that is kind of cool but not really that close: Bevel Edge Plate. Though they don’t offer it as a set so we’d have to piece it together ourselves. After that I finally got a little bit closer to what we’re looking for: the Quincy Set where at least the handle is heading in the right direction, and the Heritage Set that seems to be the closest one yet. It’s close, but not entirely there yet. The line seems to be more defined on the plate of our friend’s door knob than the Heritage knob. I wish I could see the Heritage knob from some different angles so I could better determine the resemblance. So I guess that’s where we’re at with our living room/guest room door knob. If anyone reading this happens to stumble across my friend’s door knob, or perhaps recalls the name of the style please, please, please let us know! We would love to get this style for our door – without having to kidnap our friend’s! ;-) And if someone doesn’t feel comfortable leaving a comment we can also be reached via email – info [at] westviewbungalow.com.

On a side note, and perhaps reflecting back to my previous entry, we had a great time in Chicago. One thing we were bummed about was that we figured out that we would miss the “Historic Chicago Bungalow Expo” this coming up weekend. (Maybe we could have found our door knob there!) Bungalows aside, one of the first things I noticed was the amazing lawns from the airplane. Then arriving at our friend’s house and walking around town I was only reaffirmed how amazing these lawns were. Growing up as a child in Germany I remember these lush, green, soft lawns. With the Atlanta summer heat the common grass varieties are Zoysia and Bermuda, both of which have never felt as inviting and soft to me. I was starting to think my childhood memories were just false illusions until I saw my dream lawns up in Chicago. How I envy thee! And to answer some Oak Park questions – yes, it was a very friendly and inviting neighborhood. The lady at Caribou was very bubbly and friendly, as was everyone else we encountered there (so don’t let my grouchy tour lady story hold anyone back from visiting). The neighborhood was beautiful and the houses are so huge! We’re definitely looking forward to visiting again sometime (perhaps for next year’s Expo?), and when we do we’ll have to see about getting together with some of you Chicago house bloggers so you can show us what your town is all about! And perhaps share some more funny renovation stories… :)

Posted in Our Bungalow, Photos | Tagged , , , , , , , , , , , , | Comments Off on Living Room / Guest Room Door