Archive

Holiday Weekend

Ahhh yes, a holiday weekend. A great way to get projects accomplished with that one extra day off!

We kicked the long weekend off in style. The new Cajun restaurant at the end of the street opened up the weekend before, so we rounded up a few neighbors and probably tested their working limits…fourteen of us ordering 20 minutes before closing time! Twelve of us made it back to our house, munching on alligator sandwiches, gumbo, and other Cajun goodies. Since our newbie neighbors moved in a few weeks ago at the end of the street we decided to invite ourselves over to check out their renovation. Somehow that turned into neighbor house hopping and we checked out the progress of two other houses. What a sight that must have been -– our mob of 10 walking down the street. (We lost some people after dinner.)

So after a fun neighbor gathering on Friday we got down to business the rest of the weekend. Most of the projects were fun, but one of them was a pain in the ass. A little over a year ago we hired a company to blow insulation into our attic. As the weather warmed up our recessed kitchen lights started overheating and turning themselves off. (Which, as annoying as it is, is probably a good thing as it keeps our house from burning down!!) We called the company to complain and they brought back the crew to put pipes around the recessed lights so they can have some breathing air. I think their excuse was “We didn’t know they were recessed lights” or something silly like that. You know, the kind of comment you’d expect from a company who spends their entire work day in an attic. *end sarcasm* Well, whatever they did it didn’t seem to be working because the lights still kept shutting themselves off. It has taken us a while to work up the energy to go up in the attic to solve the problem because the project is quite a task. It involves empting all the clothes out of the hallway closet, moving half the stacked boxes underneath the clothes out of the closet, putting in the short ladder to reach the attic door and slide it out of the way, and finally get the long ladder to climb in there. Like I said, it’s a task! Fortunately for heat’s sake the weather has been “cold” (relatively speaking) and rainy all May, so the attic was probably cooler than it could have been under normal circumstances. Unfortunately attic’s usually get hot even when the weather outside is mild. Patrick was trying to maneuver his way across the insulation covered attic beams to the recessed kitchen lights – which are thankfully near the attic opening (as opposed to all the way across the house).

The idiots from the insulation company had taken pipes that were barely as large as the recessed lights, and half ass taped them together with duct tape. Then they pretty much managed to fill the pipes back up with insulation when they recovered the area. Geniuses, simply geniuses. So we opted to remove the half ass coverings and scrape any insulation close to the lights to the side. Yes, I know that reduces our insulation, but it feels much better not to have your kitchen lights create a light show blinking on and off, and it makes us feel more at ease knowing the attic won’t catch on fire.

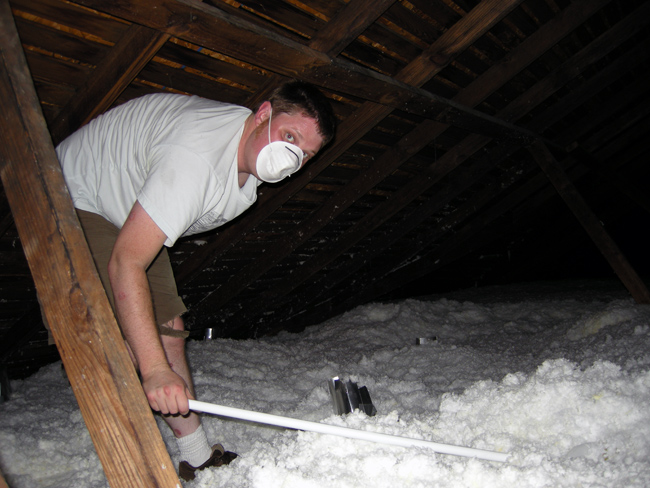
This is a picture of Patrick balancing on beams. It was about 5 minutes before he hit his head on a lantern he hung up from a nail, causing the lantern to plop into the insulation and me cracking up laughing. Apparently laughing at a hot, sweaty, stressed out guy balancing on a beam in an attic frantically looking for a buried lantern is not a good idea. He got mad at me for laughing and asked me to help find the light instead. Of course that only made it worse as I had to hold in my laughter while trying to explain where I thought the lantern may have fallen. Towards the end we switched places and I crawled in the far reaching corners at the tip of the roof where Patrick was having a harder time crawling into. The good news is, so far no lights have gone out since then. Keeping my fingers crossed for those July and August temperatures…
Attic insulation clearing

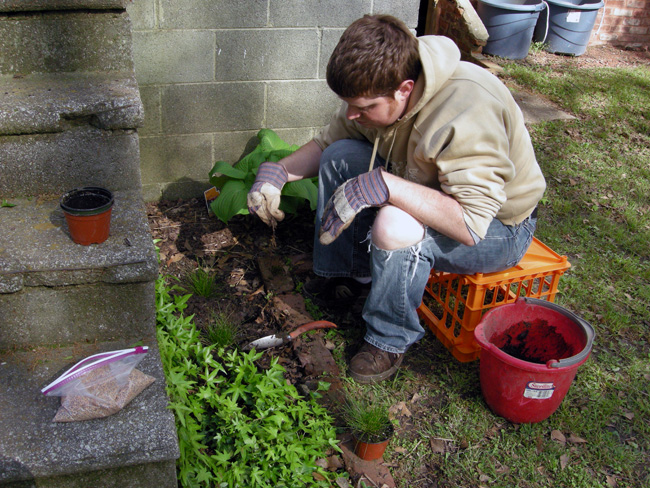
The next project was much more calming…and we were able to breathe a little easier. We made a new corner bed and planted Rosemary. Awwww, look at Patrick – he still has some insulation stuck on his unshaven chin! The Rosemary is next to him in the background. In the foreground is a lantana we planted last year.
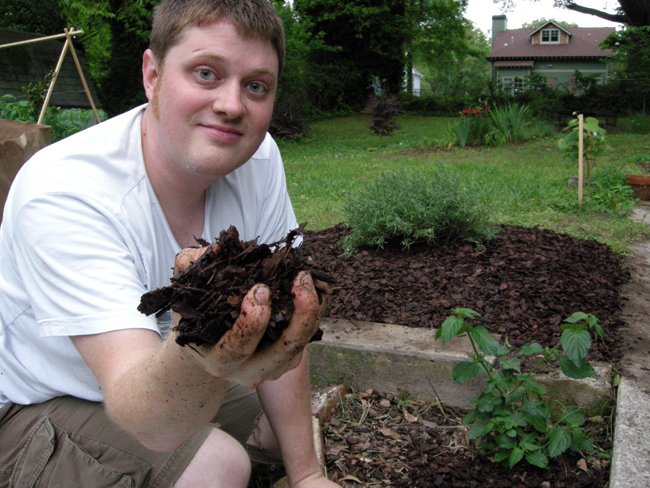
Rosemary planting

This project makes me laugh…we got a Pink Knockout Rose from my parent’s friends that we’ve been trying to plant since we got it a month ago. Of course since we didn’t have a planned project we didn’t know where to put it. So finally today we ended up planting it. Only to plant one rose we created a whole garden bed. (An extension to the Rosemary bed.)
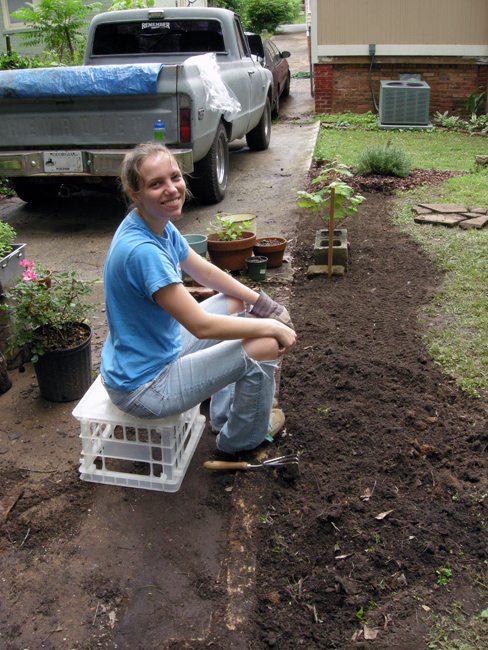
Prepping garden bed

But digging garden beds never comes without surprises in our garden. I swear we feel like archeologists whenever we get out the shovel. My biggest complaints are coat hangers (they seem to have gotten less frequent these days though) and broken glass. I swear I can’t dig without gloves because every shovel has at least one piece of broken glass in it. You can ask Patrick how often I curse because I come across another one. In any case, this uncovering was a bit more exciting as it was next to the former garage location. Some of the “artifacts” included a saw, a hammer, a tire wrench, a large hinge, and other miscellaneous items.
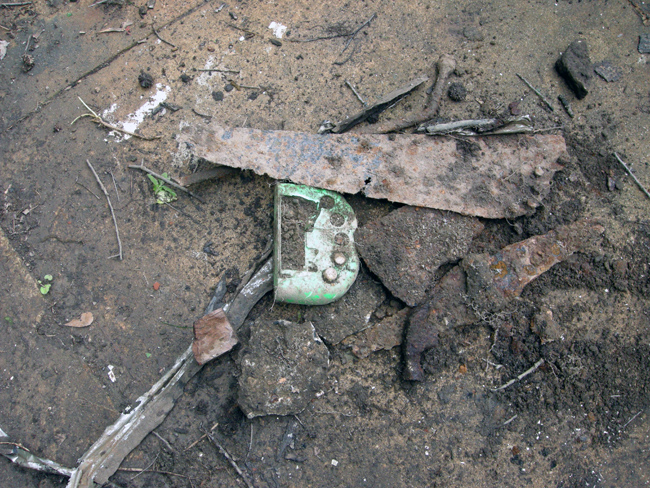
Uncovering artifacts

Other uncovered items included some larger rocks, which we decided to put amidst our other garden bed. I’m loving the Monte Negro Lilies by the way! The other two varieties haven’t bloomed yet. And I’m upset about this non-stop rain as it seems to be drowning my row of Lavenders.
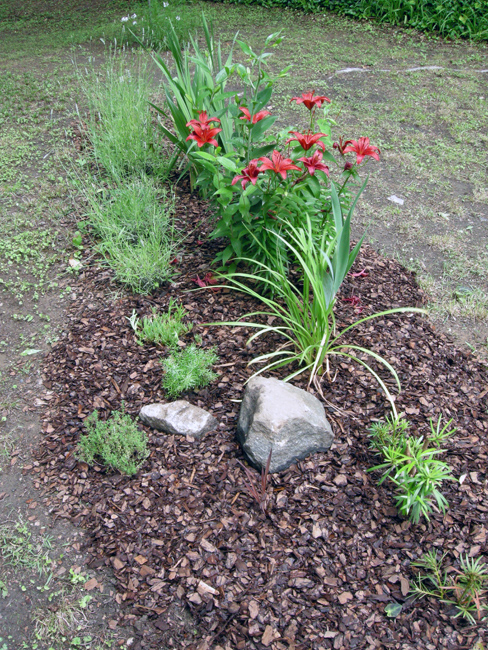
Rock accent in flower bed

And voila, our new driveway garden bed! In the back you see the Pink Knockout Rose. We used the new garden bed opportunity to plant some other things we still had sitting around in pots. By the Rose we also planted a Weigela Carnaval that we transplanted from next to the stairs, some Shasta Daisy’s I grew from seeds over the winter, a Gerbera Daisy left over from last year, and a miniature Rose I received for my birthday. The other items you can see are the grape vine, which has grown tremendously this year, a little stepping stone path we made from uncovered concrete blocks (found from digging in that garden bed), the Rosemary, the Lantana and Lantana cuttings that I’m trying to propagate in a pot.
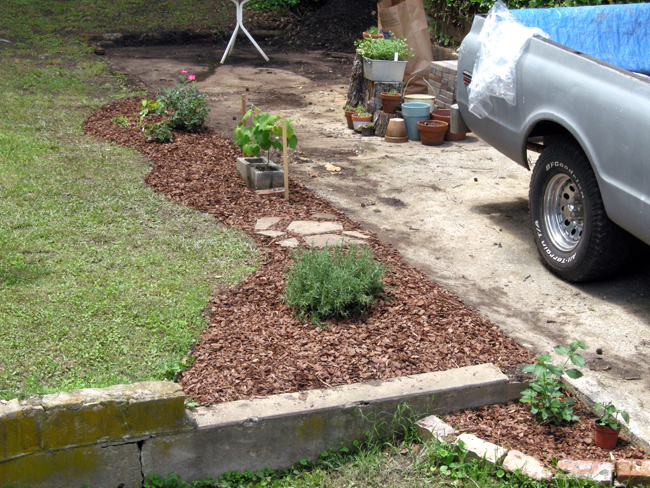
Driveway garden bed

Phew, so now that it feels like we got a ton of work done over the weekend we’ll see what this upcoming week brings us with the painters! *biting my nails*

Posted in Gardening, Our Bungalow, Photos, Westview Bungalow | Tagged , | Comments Off on Holiday Weekend

Plants, plants, plants

We’ve had quite the eventful week. With temperatures hovering around 70 in the day and 50 at night we determined last weekend would be the weekend to go plant shopping. Initially we anticipated going Saturday, but knowing how busy our favorite nursery (Growers Outlet in Loganville) gets we decided to skip out of work a little early (that’s like crazy talk for us!) and go on the mini road trip on Friday afternoon instead. Can you tell we’re spoiled intown people who consider anything further than 10 miles away a road trip? Haha. So we made the one hour ride up there. I was so excited I had butterflies – how dorky am I! I’ve been trying to come up with a good garden plan for the area next to the shed for a little while. Since our back yard gets pretty shady in the summer when all the trees are grown in, and since the bed I was planning was on the north side of the shed I had to make sure the plants were shade loving. Plus we want to keep as many plants perennials as we can.

So some hours and $97 later we ended up with around 60 plants. (More if you count the fact that some plants came in six packs.)

Plants from Growers Outlet

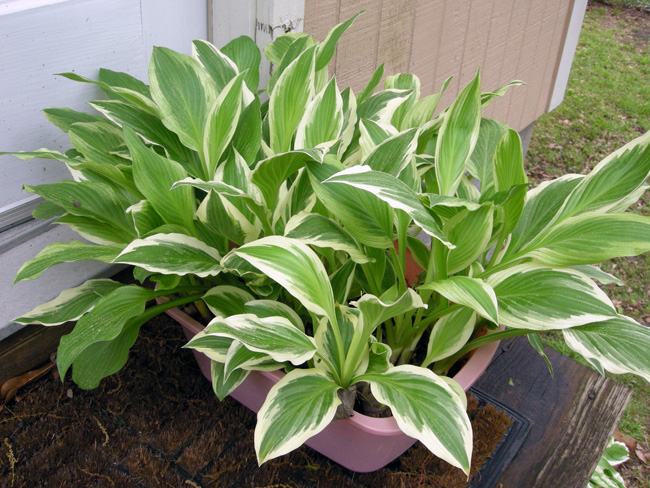
Plus our friend from West End gave us a whole bunch of hostas! Thanks Debbie!

Hosta present

So of course it was night and we wouldn’t get to planting until Saturday, but at least we could plant all day instead of spending half of it at the nursery. Which was clearly needed time with all those plants! So we finished dinner and I was in the process of pre-rinsing the dishes and…”Oh crap!” (me)…”What happened?!” (Patrick)…”I cut myself with the steak knife” (me – staring in shock at my cut between the index and middle finger with flesh just floppin’ around under the running water). Well that didn’t really fit in with my plans of planting. *big sigh* Such an inconvenient spot too where you can’t really put a bandaid or anything. Interestingly enough it didn’t hurt at all. Well, I guess I shouldn’t say “at all” because it obviously wasn’t comfortable, but the pain was less than the three days I always suffer from an ant bite! Needless to say I was more of a planting assistant the next day…

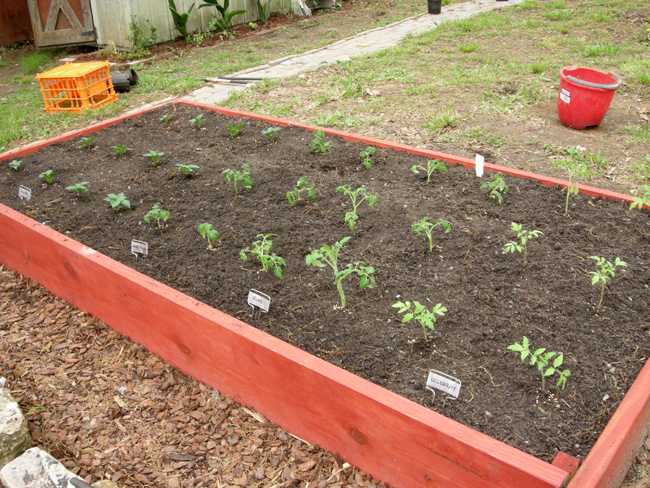
One of the things we finally were able to plant was the raised garden bed that we built a few weeks earlier. It looks like this year we’ll have a garden bed with only tomatoes and bell peppers. From left to right we’ve got the bell peppers, “Sweet Million” tomatoes, “Roma” tomatoes, and “Celebrity” tomatoes.

Raised garden bed

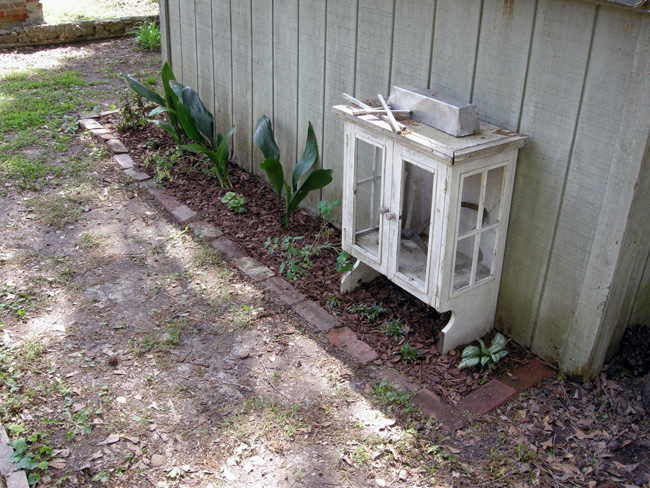
So like I mentioned, my big project was the north side of the shed. In previous years I think we’ve done bad planting, not being conscious of the requirements for the plants we were putting there. (I’ll use the “I’m a newbie gardener” excuse.) So we tore out the dead rose we bought our first spring and transplanted the other living rose to the southern side of the house. Then we planted three Cast Iron plants, two McKana’s Columbines, two Tiger Stripe Foamflowers, four Chocolate Chip Bugleweeds, and one Lungwort Opal.

Plants by shed

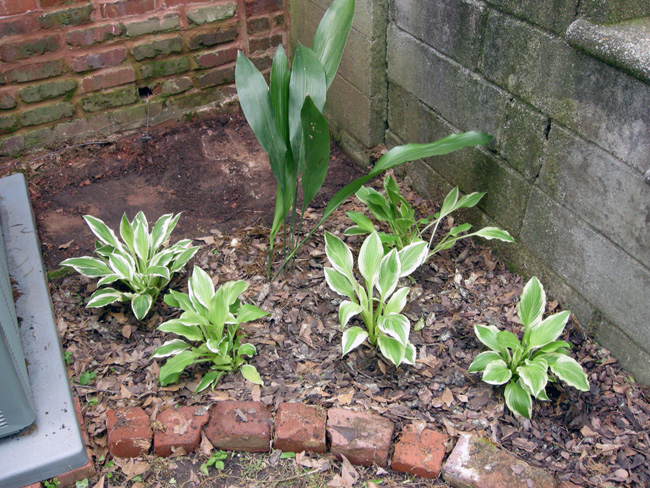
In the space by the back steps we dug up the Weigela Carnaval we planted the first spring and transplanted it in a pot for the time being. In place we put another Cast Iron plant and Debbie’s Hostas. I’m not sure which kind they are. Same scenario as the north side of the shed, this area seems to get a lot of shade in the summer with all the trees, so I think between the shade and the fact that the area floods during rain the Weigela wasn’t happy in that spot. Hopefully these plants should fare better in this location. I’m liking it in any case!

Plants by back steps

On the other side of the steps we’ve planted Purple Fountain Grass the past two years (annuals). This year we thought we’d try three little Fiber Optic Grass. The ivy that we’ve moved around for years in that spot seems to be following the rule of “the first year it sleeps, the second year it creeps, the third year it leaps”. It’s been rather contained up until this point, but this spring it’s really exploded and is growing up the side of the stairs. I know I’ve been cursing the English Ivy growing all over our property, but as long as we can contain this one I like the idea of it clinging onto the ugly cement stairs.

Patrick planting

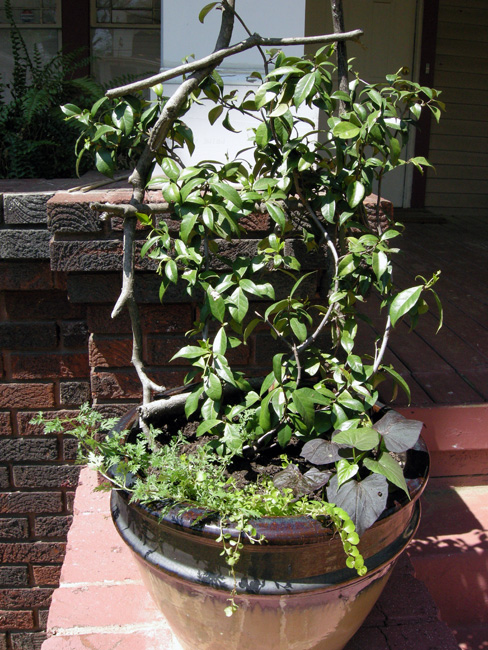
In the front step pots (the ones that have the Confederate Jasmine) we planted a Verbena, a Creeping Jenny, and a Potato Vine (left to right).

Front porch potted jasmin

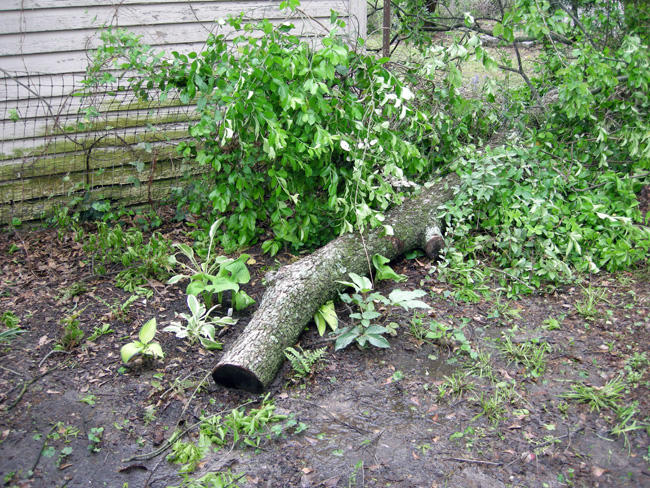
We planted three more of Debbie’s Hostas in our “woodland garden” behind the shed. Then our neighbor decided to cut the tree off his shed one evening this week. Back in November a neighbor’s tree fell, landing on their shed and partially ours. Back then the neighbor cut the tree on our property off, but had left the trunk lying on his shed until now. To our dismay we found the trunk on our fence and woodland garden the next morning. Not sure what he was trying to achieve by rolling the trunk off the shed’s roof and onto our fence? I know the fence was only crappy chicken wire and I want to get rid of it real bad, but that didn’t mean I wanted it crushed by the tree in the meanwhile! Although our bigger worry was probably our poor little plants getting crushed! All things considered if it had to crush any plants, the plants it fell on were the best option. It smashed one new Hosta, which happened to be the smallest of all the ones we planted, and one Fern. Who knows, maybe the Fern will recover and the Hosta come back next year?

Fallen tree

I missed taking photos of a few other things that were planted so I’ll post about them next time. In the meanwhile my fingers are still wrapped up from my cut. I’m eager for it to heal now! A week of wrapped together fingers is getting annoying.

Posted in Gardening, Our Bungalow, Photos, Westview Bungalow | Tagged , | Comments Off on Plants, plants, plants

Composting for Newbies

We did it. We finally joined the composting culture.

Growing up in Germany composting was always such a natural thing. Just about everyone I knew had a little vegetable plot in their yard and a compost hidden somewhere in the corner of the garden. My parents always had a compost. Actually they must have been pretty serious because they had the three bin compost going on. I’m not sure what sparked my interest in wanting to do a compost here, but I told Patrick I thought it would be cool to start composting so we can have our own healthy earth for the garden. The space behind the garden shed seemed perfect because it will be pretty hidden back there. Patrick was game and ready to start. For that matter he was ready quicker than I was because he said “let’s just start a pile.” Being the German that I am I needed order…I needed a box to contain the pile in. So even though we didn’t have a box yet we added scraps to a pile. But the compost didn’t really become official in my eyes until we built the box today!

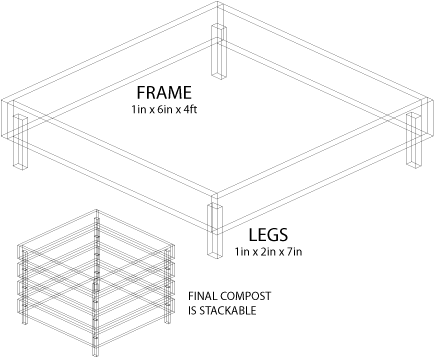
After some internet research we determined the easiest way would be the stacking method. You put the legs an inch lower than the boards so that one can be stacked on top of the other:

Compost Diagram

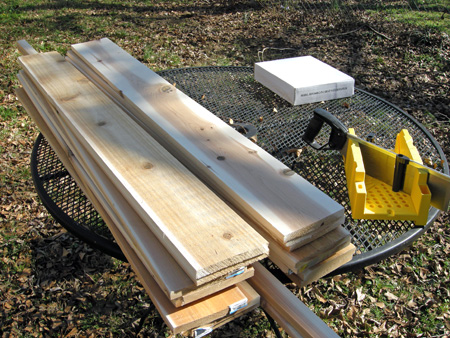
Patrick determined that even though it won’t be the cheapest method we should build it with cedar so it won’t weather as quickly. So off we went to the big box store and bought some 1″ x 6″ x 8′ cedar boards for the walls and 1″ x 2″ x 8′ for the supporting legs. Thankfully the big box store offers cutting, so we went ahead and got them cut in half (1″ x 6″ x 4′) so we wouldn’t have the extra work ourselves. The store had the super saw and was able to cut all eight boards in one go!

So here’s our pile of materials all ready to go!

Cedar wood for compost

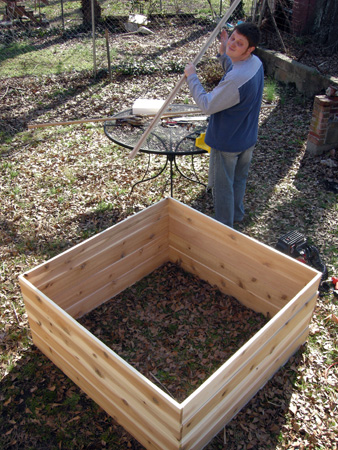
Step 1: Nail/screw together your boards to make a box.

Step 2: Cut the supporting legs into 7 inch pieces (1 inch larger than the boards to allow air flow). Attach legs to interior box walls.

Building cedar compost

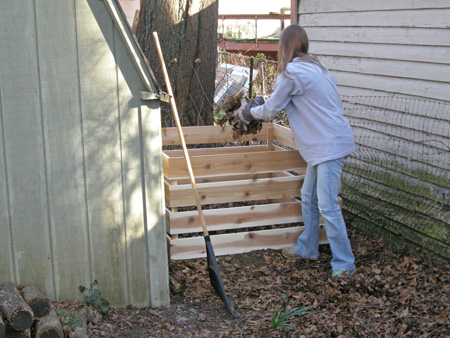
Step 3: Stack your boxes on top of one another over the started compost pile hidden behind the shed.

Step 4: Throw in some leaves that you haven’t cleaned since fall for good measure.

Composting leaves

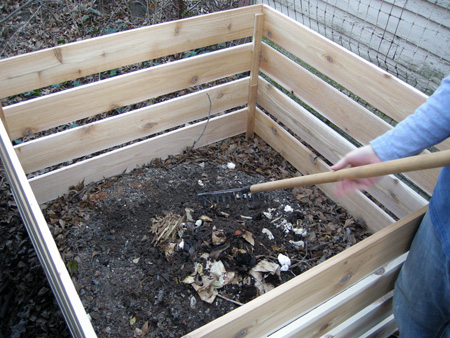
Step 5: Mix up the pile of kitchen waste and leaves.

Step 6: Keep adding to pile and repeat steps 3 through 6 until your waste turns into earth. (Or so we’re told.)

Raking compost

Since we’re composting virgins we’re obviously curious what our mess will turn out to be. I understand not too much will probably happen until the temperature goes up a bit more. We also bought one of those earth test kits. I haven’t actually used it yet. That way we’ll hopefully be able to find out what our compost pile will need most of to neutralize the existing earth in the garden. Wish us luck in our new venture!

Posted in Gardening, Our Bungalow, Photos, Westview Bungalow | Tagged , , , , , , , , , , | Comments Off on Composting for Newbies

Holly Stump

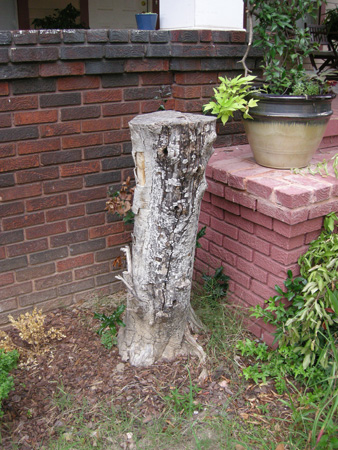
One of my big bothers has been the giant holly stump in front of our house. First of all I don’t like holly’s because they’re prickly, but secondly I don’t think having a holly stump the width of a medium sized tree in the front yard is very aesthetically pleasing. The other day we finally got out the chainsaw and cut it down, woohoo!

Before:

Holly stump

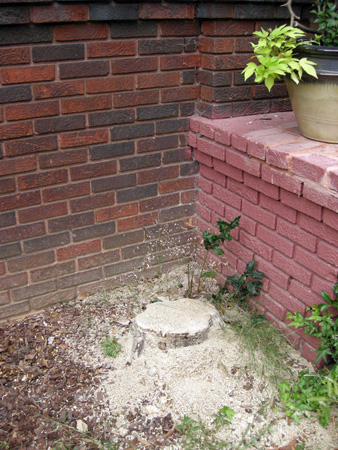
After:

Holly stump

So the stump is still there, but at least not as tall as it was before. I think I’ve read of some chemicals that can help break it down? I think I’d be scared to get a stump grinder so close to the house. In any case, I’m glad it’s not so prominent anymore. The live one on the other side of the steps it still there, but I suppose that’ll wait until another time.

Posted in Before and After, Gardening, Our Bungalow, Photos | Tagged , , , , , , , , | Comments Off on Holly Stump

General Updates

I thought I would post some general updates…

Westview Bungalow

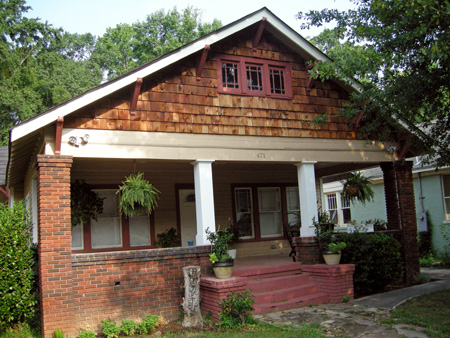
Front of our house

It seems like it’s been a while since I’ve posted an exterior house shot. We installed some hooks this spring so we could hang up ferns – and I’m loving them! Otherwise our house is still pink, still has that ugly tree stump, and still has that beat up path. At least one of them will get worked on soon…but I’m not going to tell you which one! :)

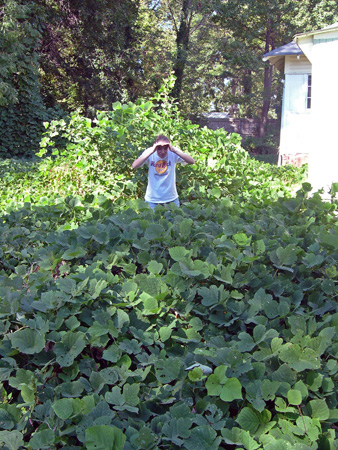
I’ve talked about our kudzu musings and frustrations in the past (See photos from May 2007, June 2007, July 2007 I, July 2007 II, and September 2007), and took a photo of the neighbors yard last October (2007):

Lost in kudzu field

Lost in kudzu field

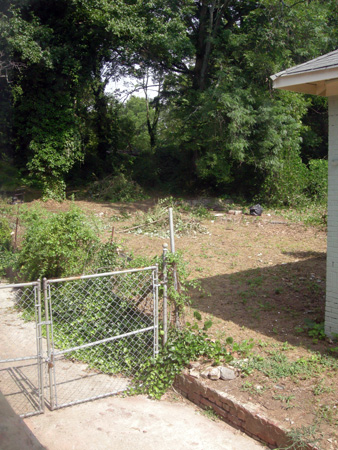
Well I’m glad to finally be able to present some change! Our new neighbor moved in back in April. He’s fought unsuccessfully with the landlord to get the back yard cleaned up so his kids could play in it. He has finally decided to take matters into his own hands and look at how far he got! I have never seen the back of that backyard cleared up since we’ve lived here, so I’m just amazed at the view – I’m not used to it!

Kudzu field removed

Kudzu field removed

So in the meanwhile back to our garden…

Vegetable bed

Vegetable bed

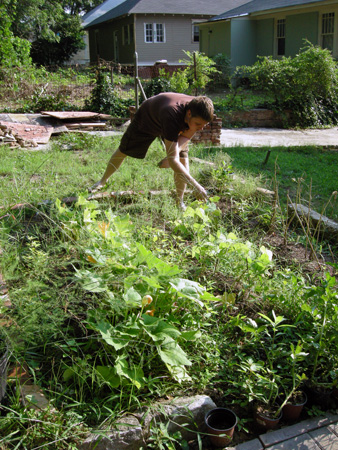
…I think we have a vegetable garden buried under those weeds somewhere! This year we had planted tomatoes, beans, zucchini, bell pepper, hot pepper, and cucumber. Our tomatoes caught some disease so we haven’t seen any harvest from them. The beans seem to grow at a steady pace, so we’ve collected beans here and there and are freezing them until we have enough to make something with. We’ve harvested a couple of zucchini’’s and were a bit disappointed with how hard they were on the outside (any tips?). The cucumber has yet to deliver. The hot peppers have had a few that we’ve collected and dried. And the bell pepper had one of decent size that was ready to be harvested when we found a squirrel had gotten to it before us! (Next one is growing now.) The weeds have yet to be removed…we’re still not quite caught up from having gone on vacation, and the torching heat, killer mosquitoes, and “convenient” rain only on weekends has hindered us from tackling the bed. (The ever-growing grass has kept us busy in the meanwhile too.) Oh yeah, and don’t we look classy with our pile of crap on the driveway?!

And more gardening…

Front yard landscaping

Front yard landscaping

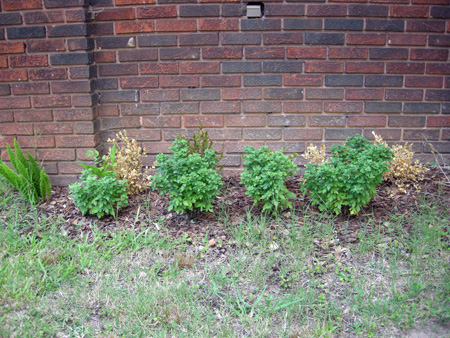
This bed looked so cute last fall, but isn’t quite as cute this year. We haven’t planted anything new, but I was excited to see the fern overwintered since it indicated it wasn’t supposed to. The yellow annuals obviously didn’t make it, but I’m glad to see the mum’s have made a return. In the meanwhile I’ve been really disappointed with the boxwoods. I was really fixed on having them as the evergreen backdrop in that bed, but they’re not doing well at all. I think they may not be getting enough water – whenever it rains the water doesn’t go on the boxwoods due to the houses overhang. I was sooo determined to have them there! We already replaced one of the plants in the spring, but now only two of the plants have survived. Anyone know anything about Japanese Boxwoods? Is it worth replanting new ones? They only get morning sun and like I mentioned hardly get any rain water. I’m simply determined to have an evergreen that doesn’t grow above approximately 3 feet in that spot that will survive in Zone 7.

Posted in Gardening, Our Bungalow, Photos | Tagged , , , , , , , , , | Comments Off on General Updates