Wood Panel Ceiling
1 CommentI’ve always wanted a wood panel ceiling in our little hallway. It’s not a big space, but it acts as the hub of our home. There are six doors in a space that’s less than 60 square feet. We don’t spend a lot of time in there, but we do spend a lot of time passing through. So I always thought a v-groove wood panel ceiling would be a nice accent to tie the room together.
We knew Randall Brothers would have the exact v-groove paneling we wanted, but Randall Brothers is only open Monday thru Friday – when we’re at work, of course. Needless to say, it took a while before we could find time to get over there and get the materials. During the holidays we finally managed to make a trip to Randall Brothers to pick up the materials we needed, so we were ready to start the project.
Just a quick side note on Randall Brothers. Even though they have a reputation for being expensive I still love going there. They have been making moulding for 125 years. If you want authentic period moulding go to Randall Brothers – not Home Depot or Lowes. If they don’t have exactly what you’re looking for they can custom mill it. All of this in the heart of Atlanta. I love it.
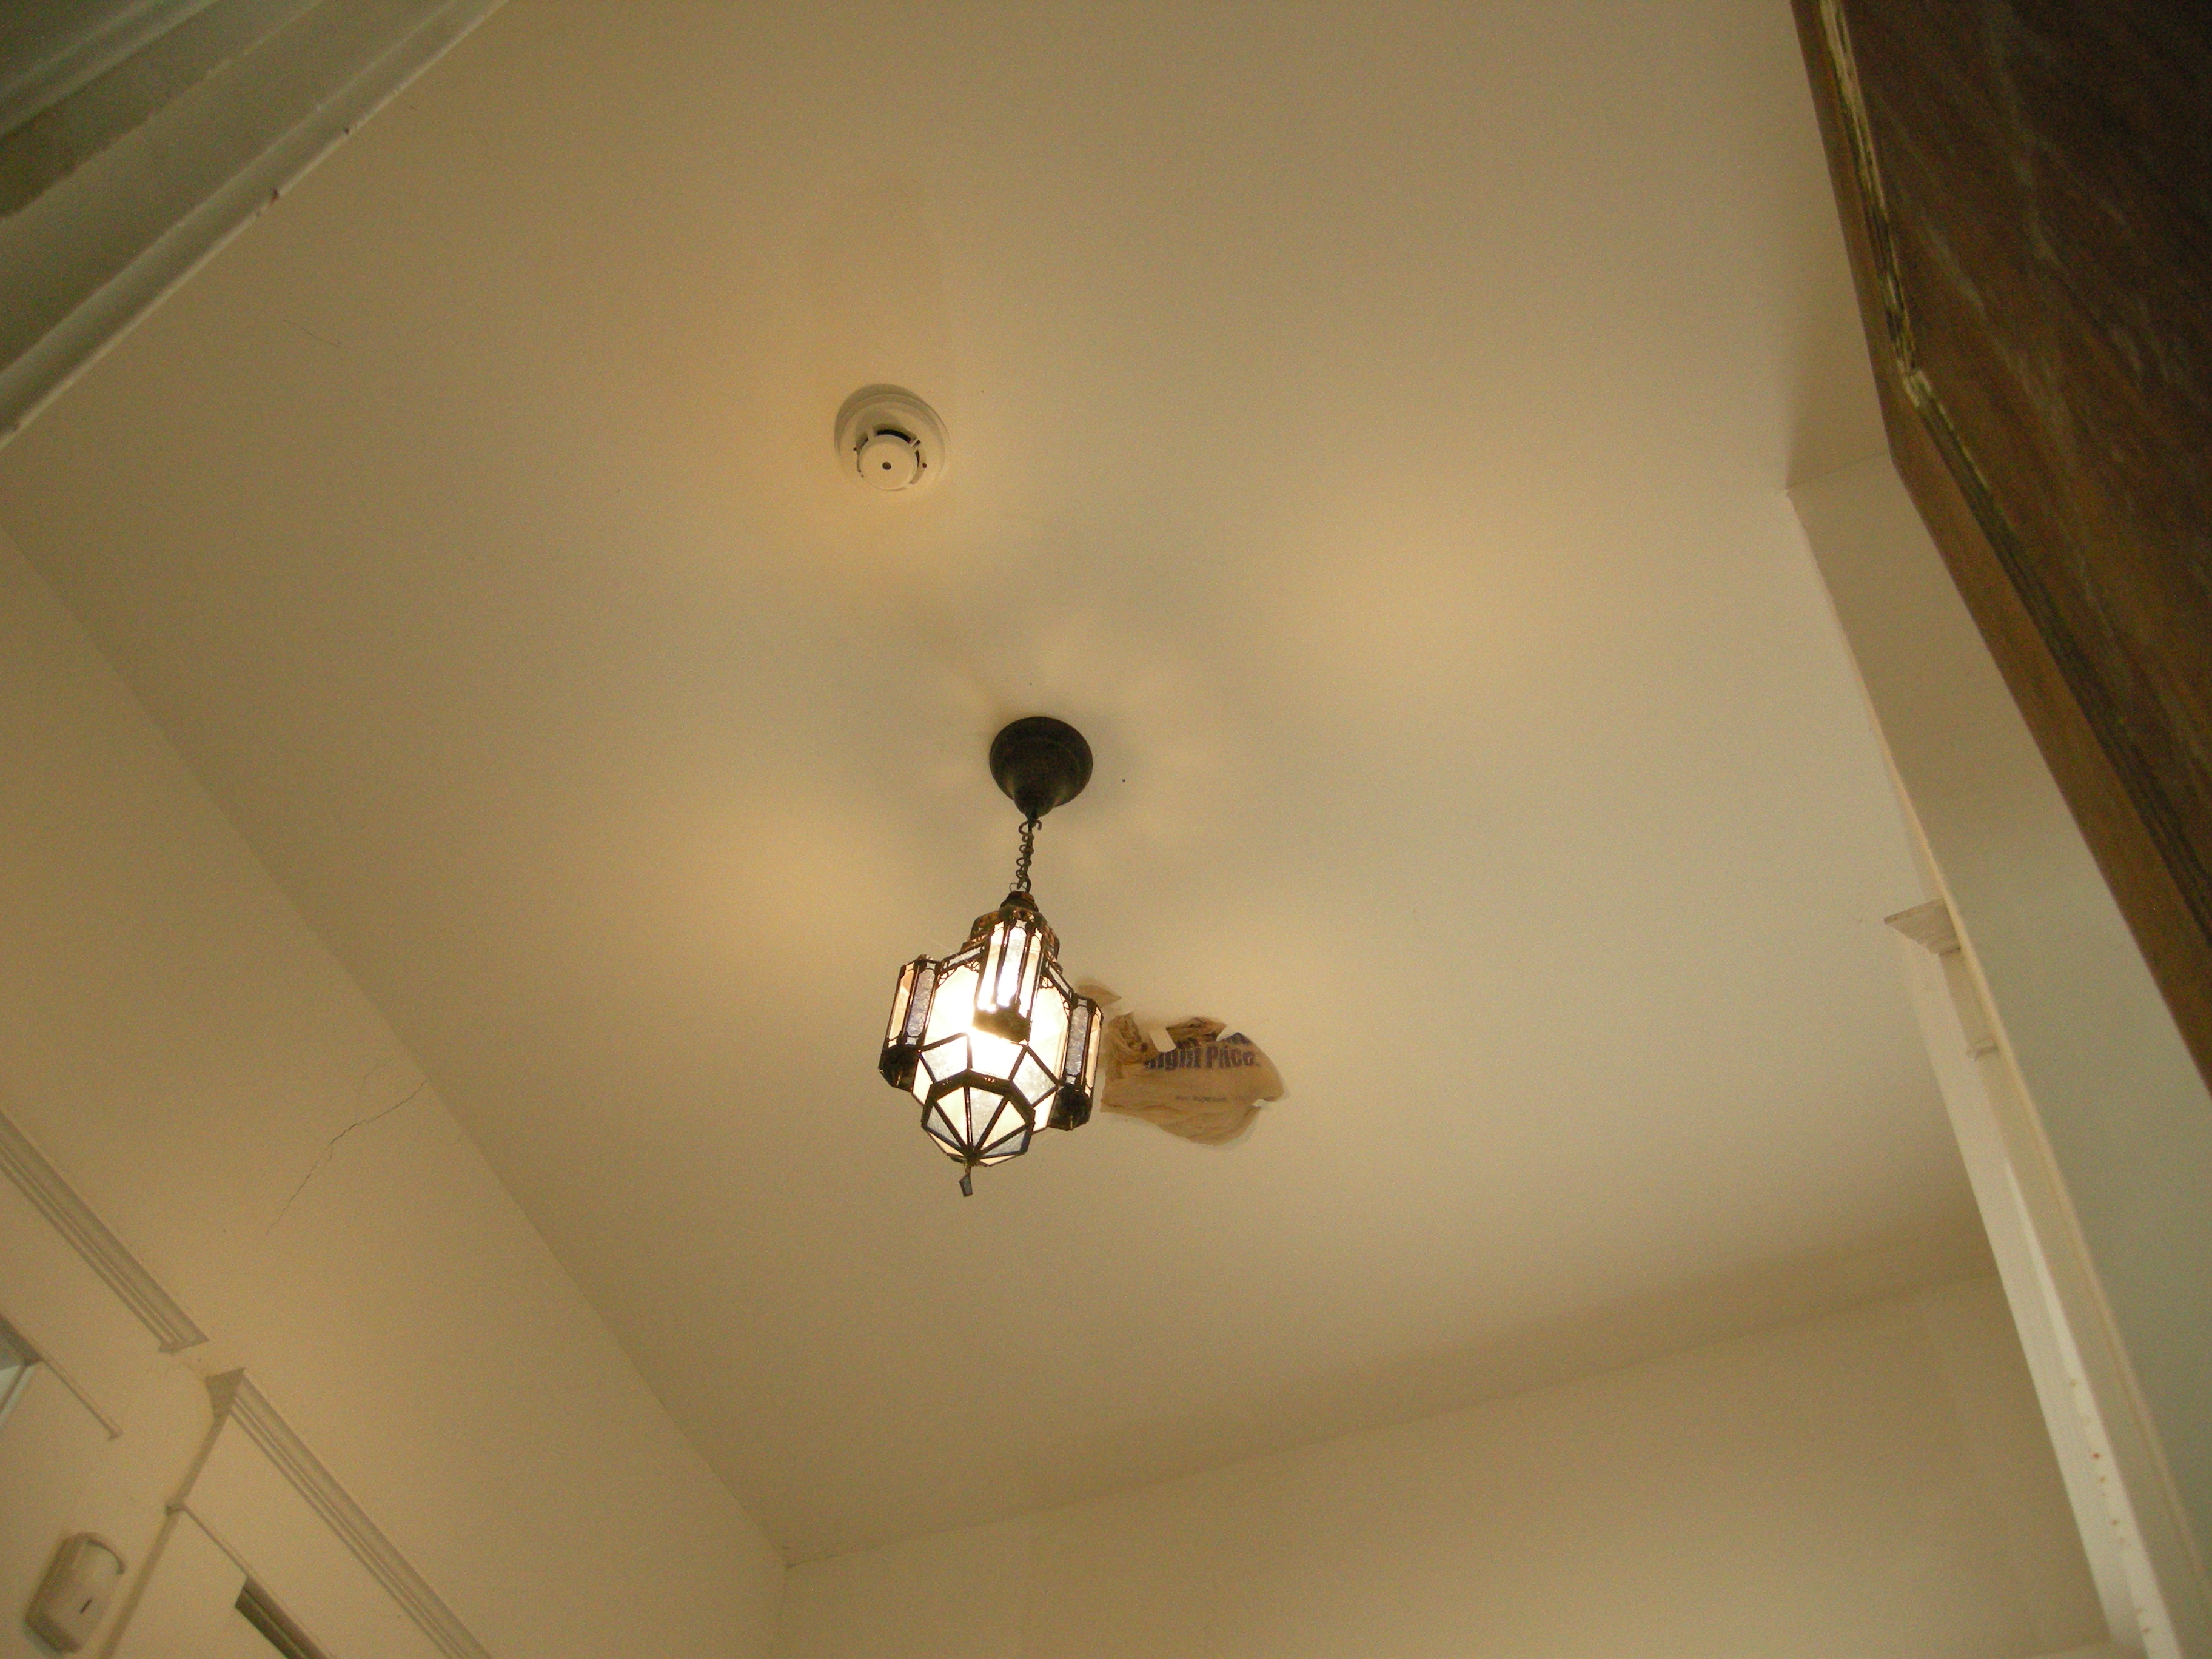
So without further ado, here’s what it looked like before… just your standard plaster ceiling.
The v-groove paneling we bought is tounge and groove style paneling, so you start with one piece and work your way across the surface. Just keep a rubber mallet handy to knock in each board as you go. And of course a nailgun makes the job go faster. If you have a light or smoke detector you’ll have to get creative with your holes.
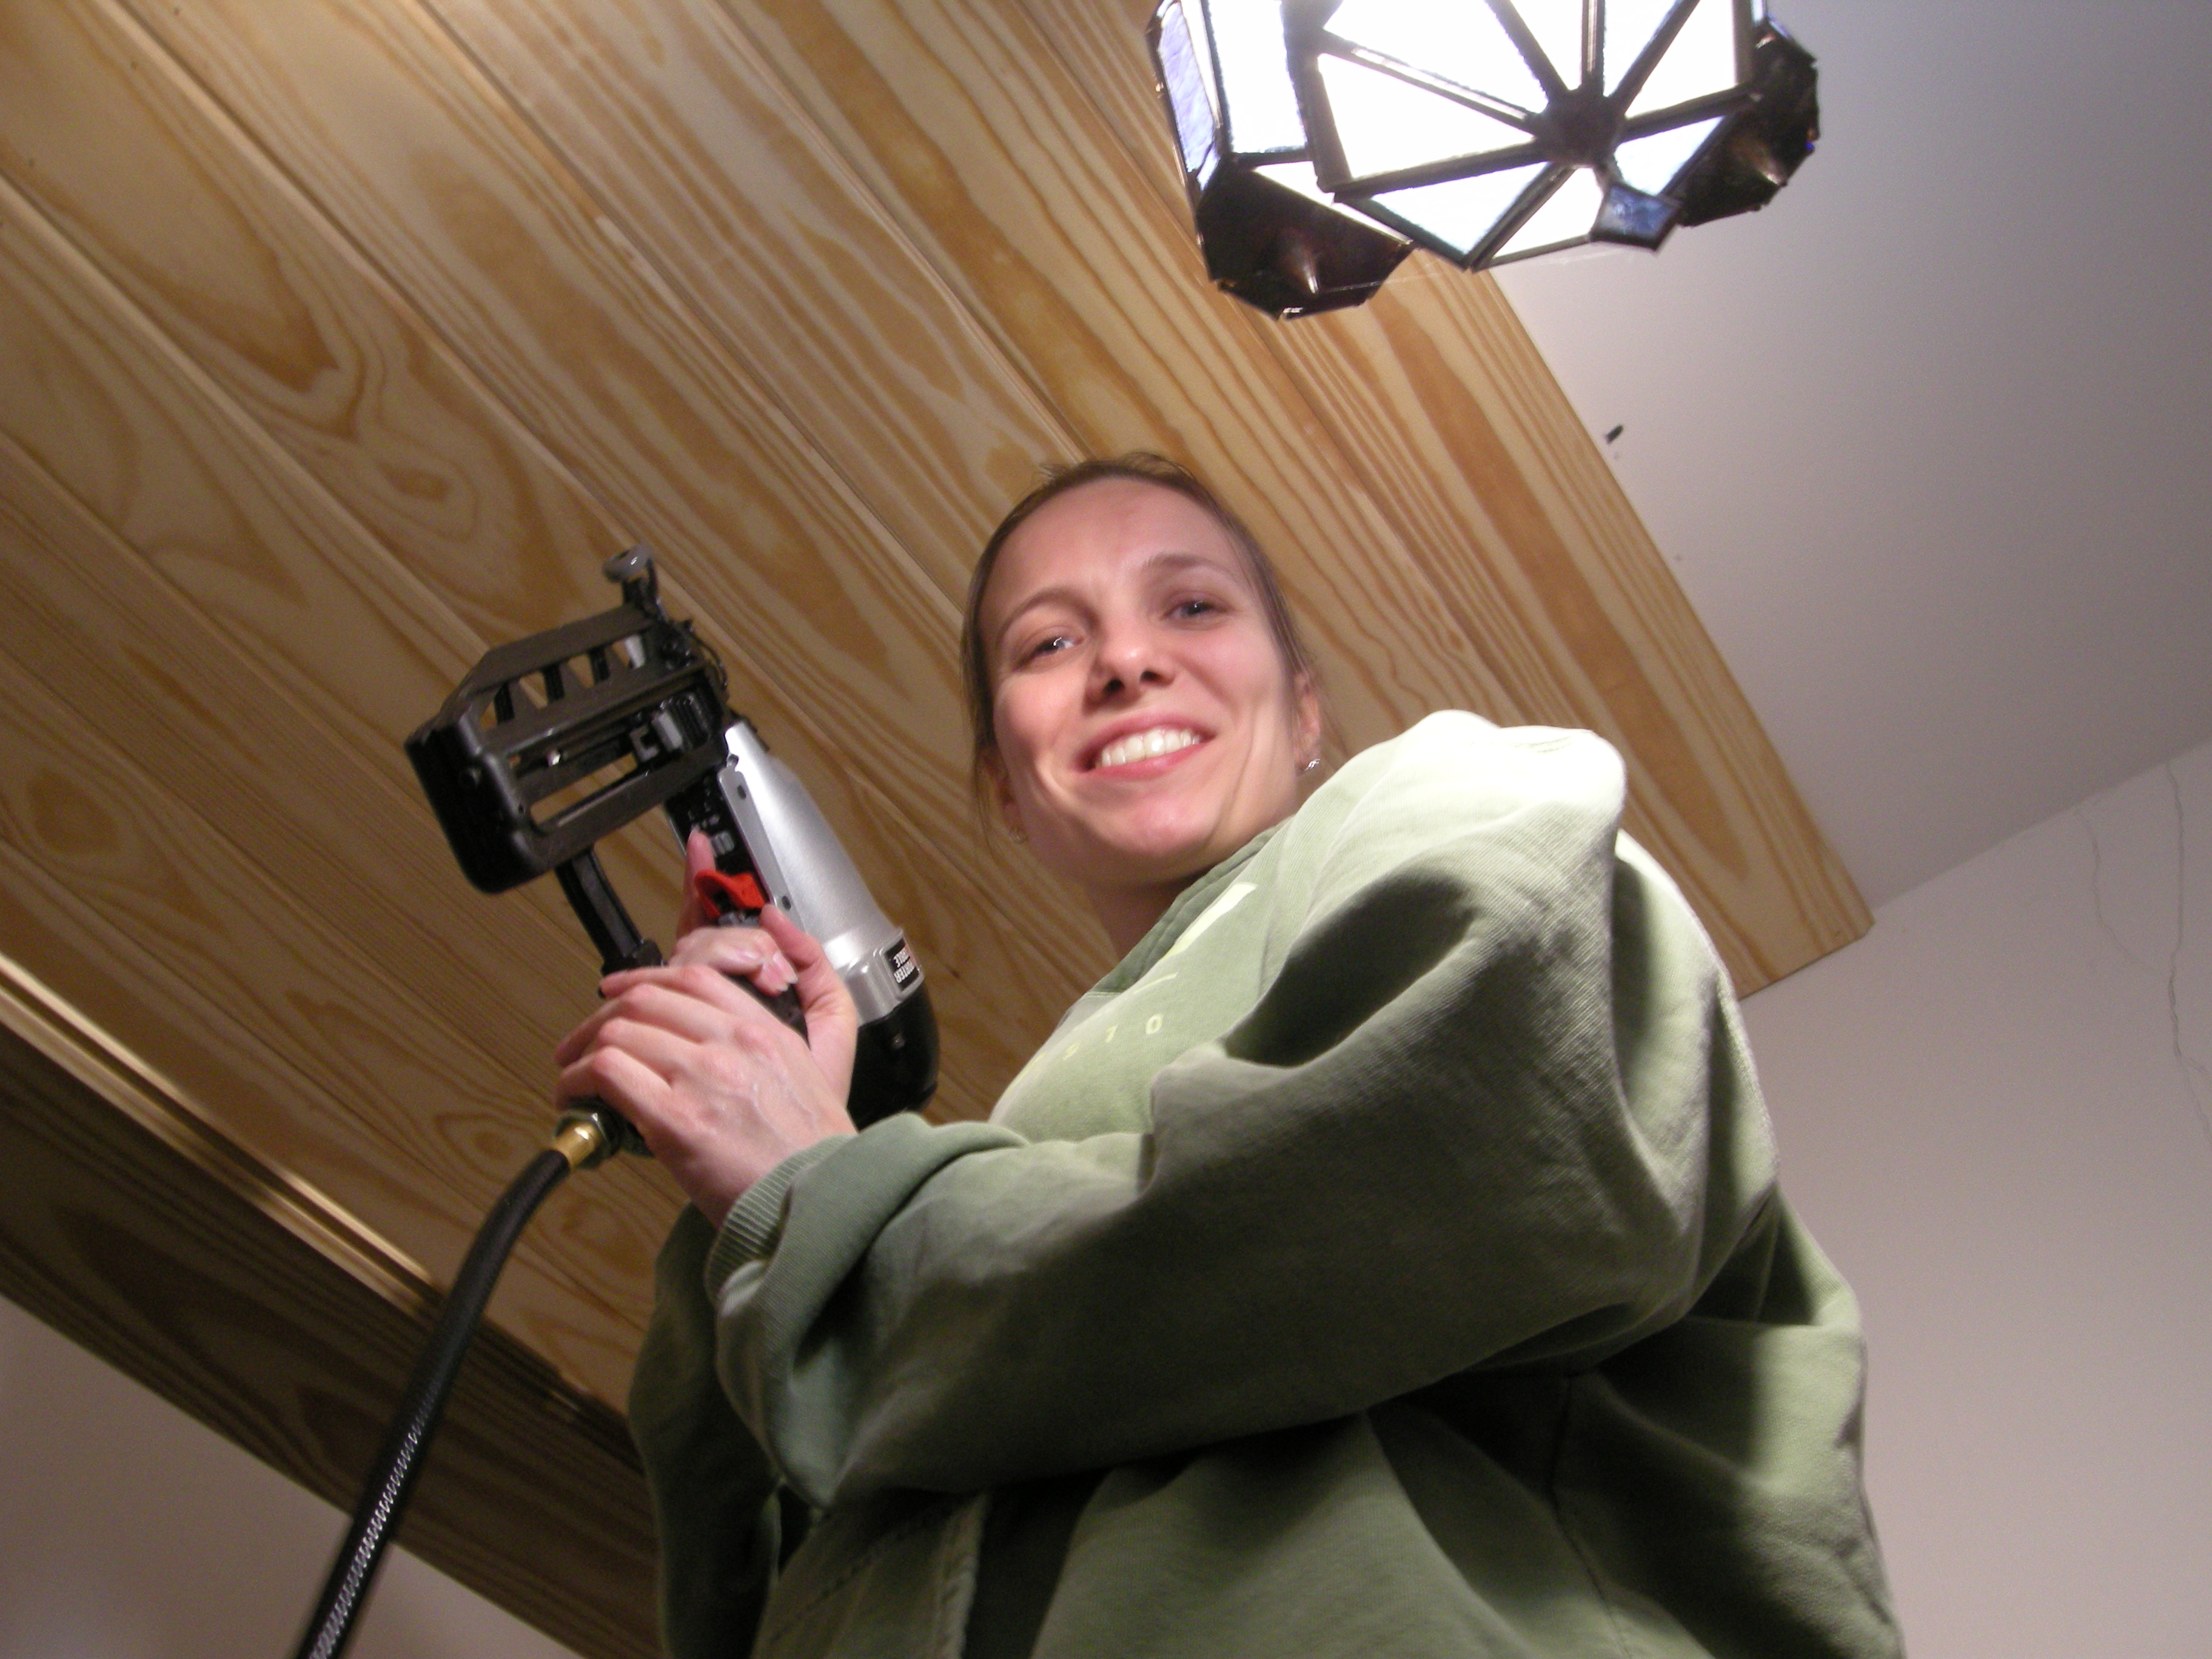
My kind of woman. She’s not afraid to use the nailgun!
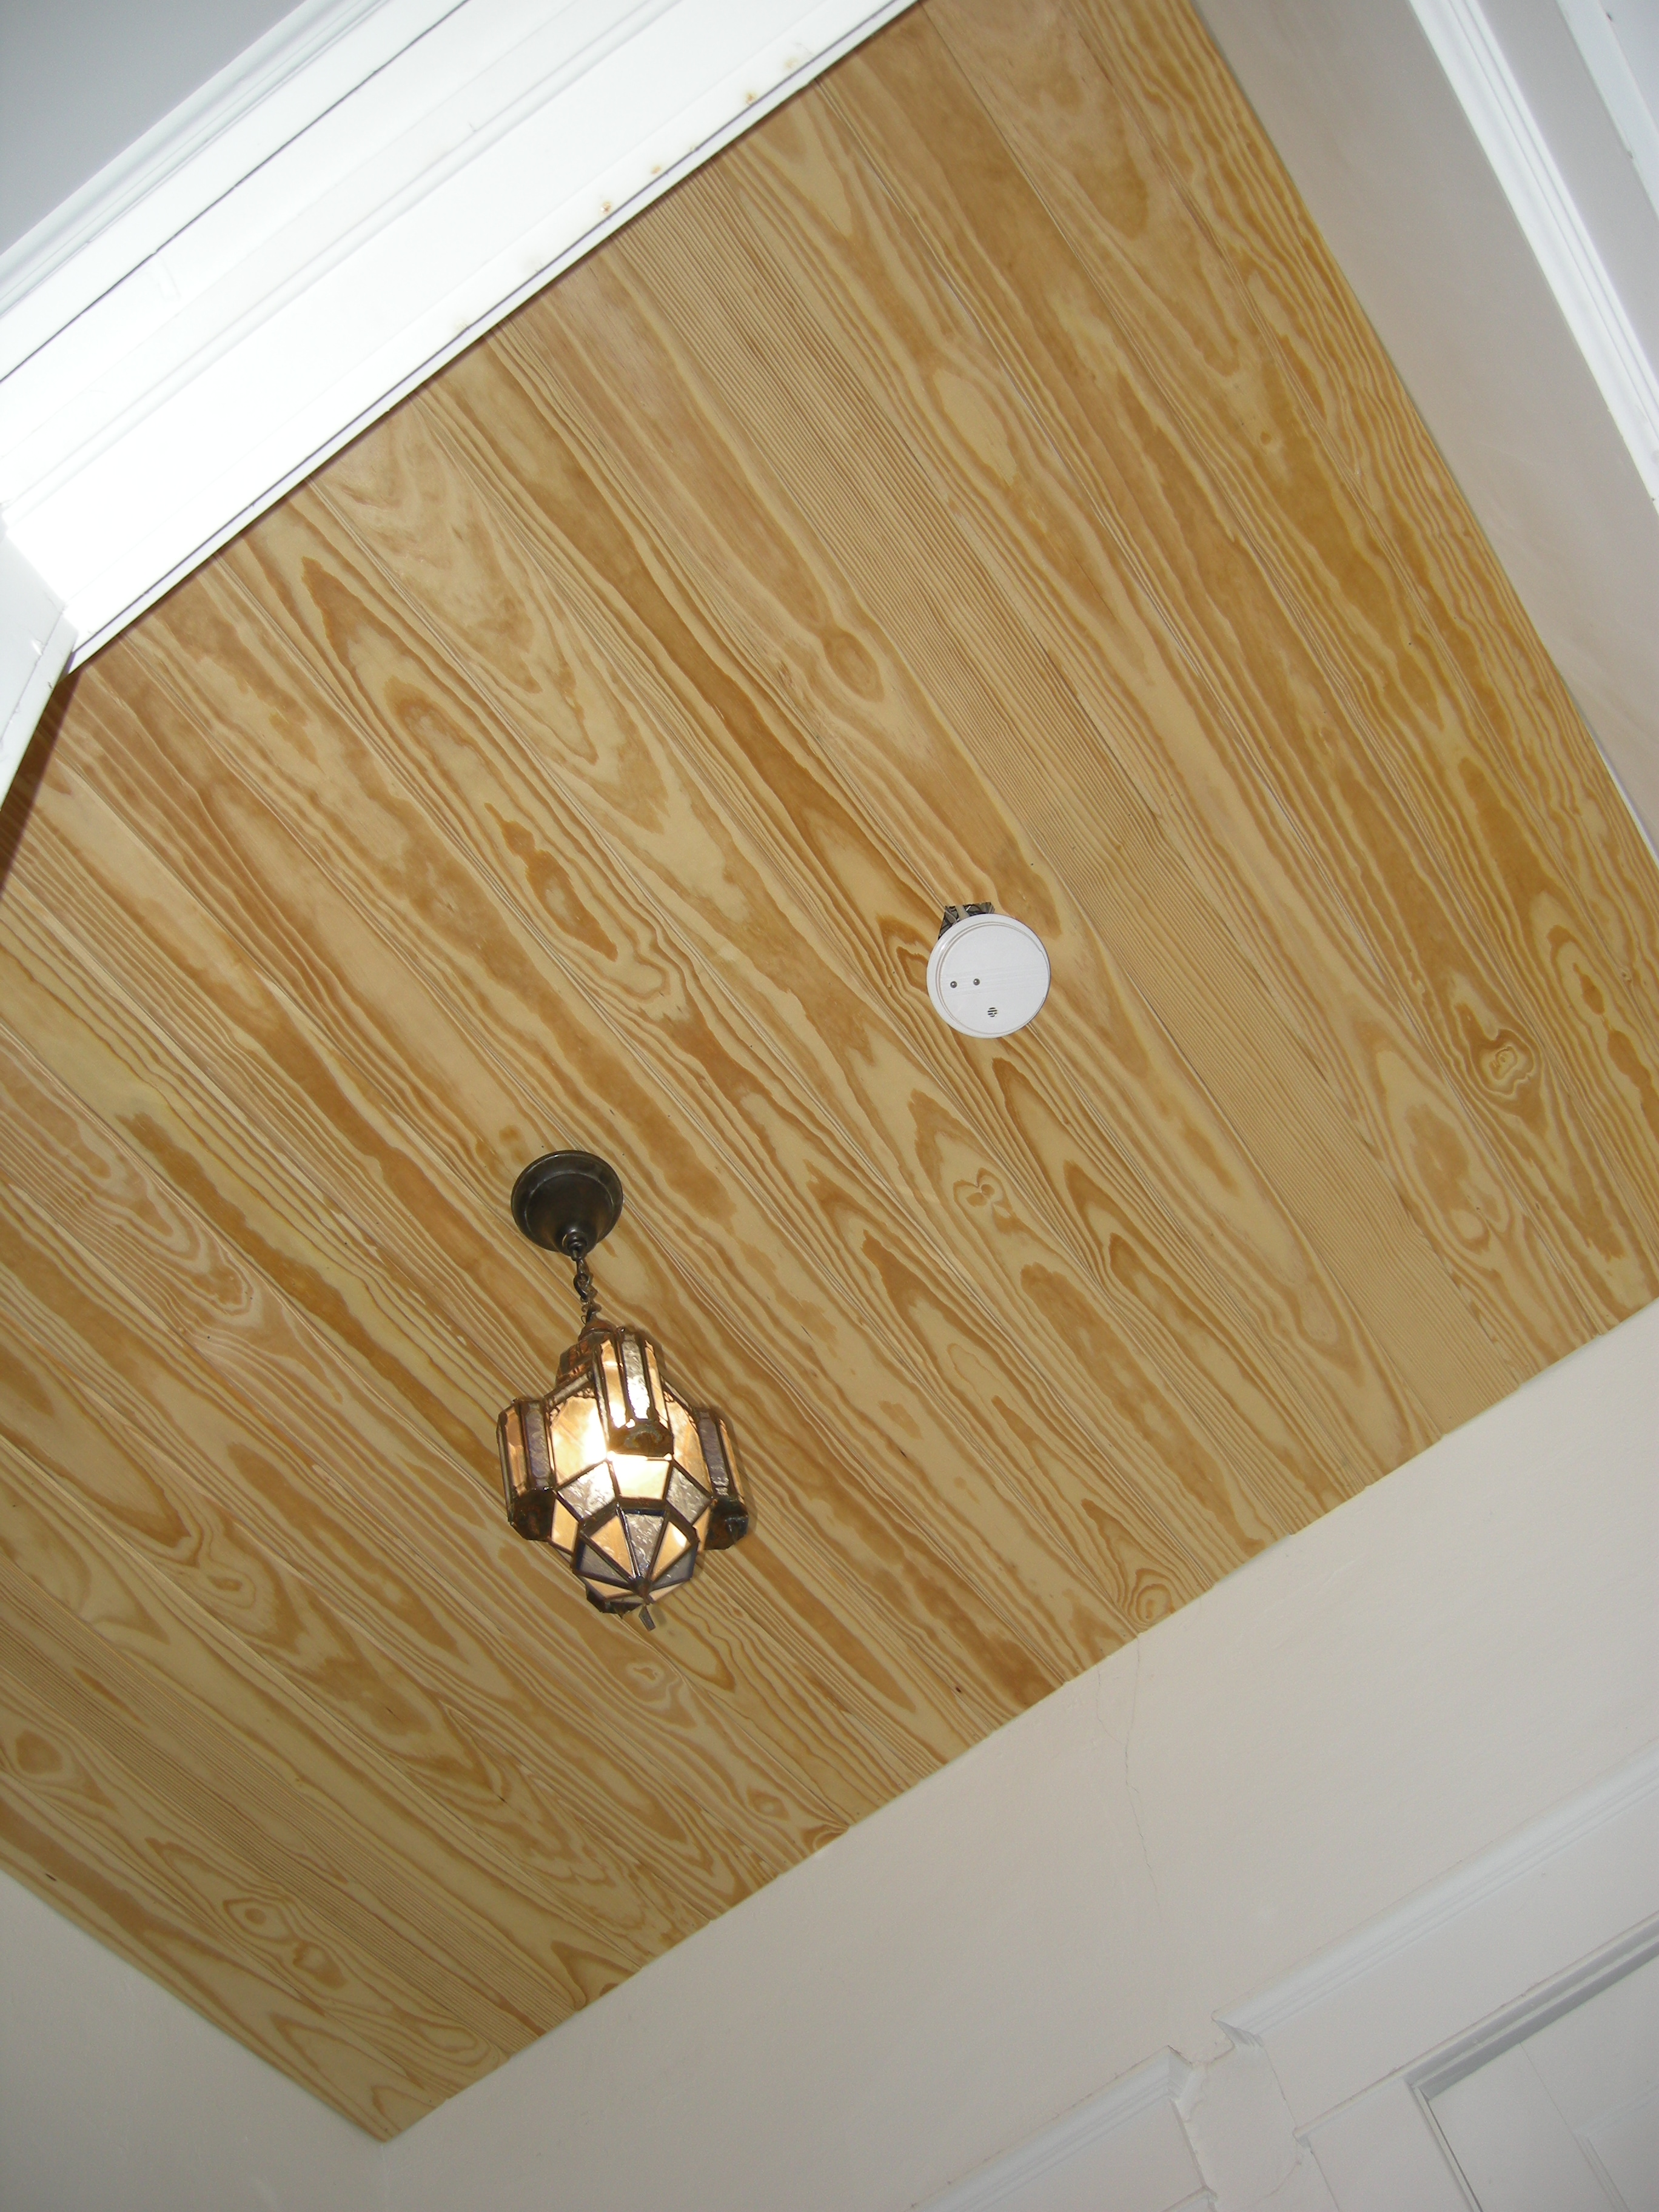
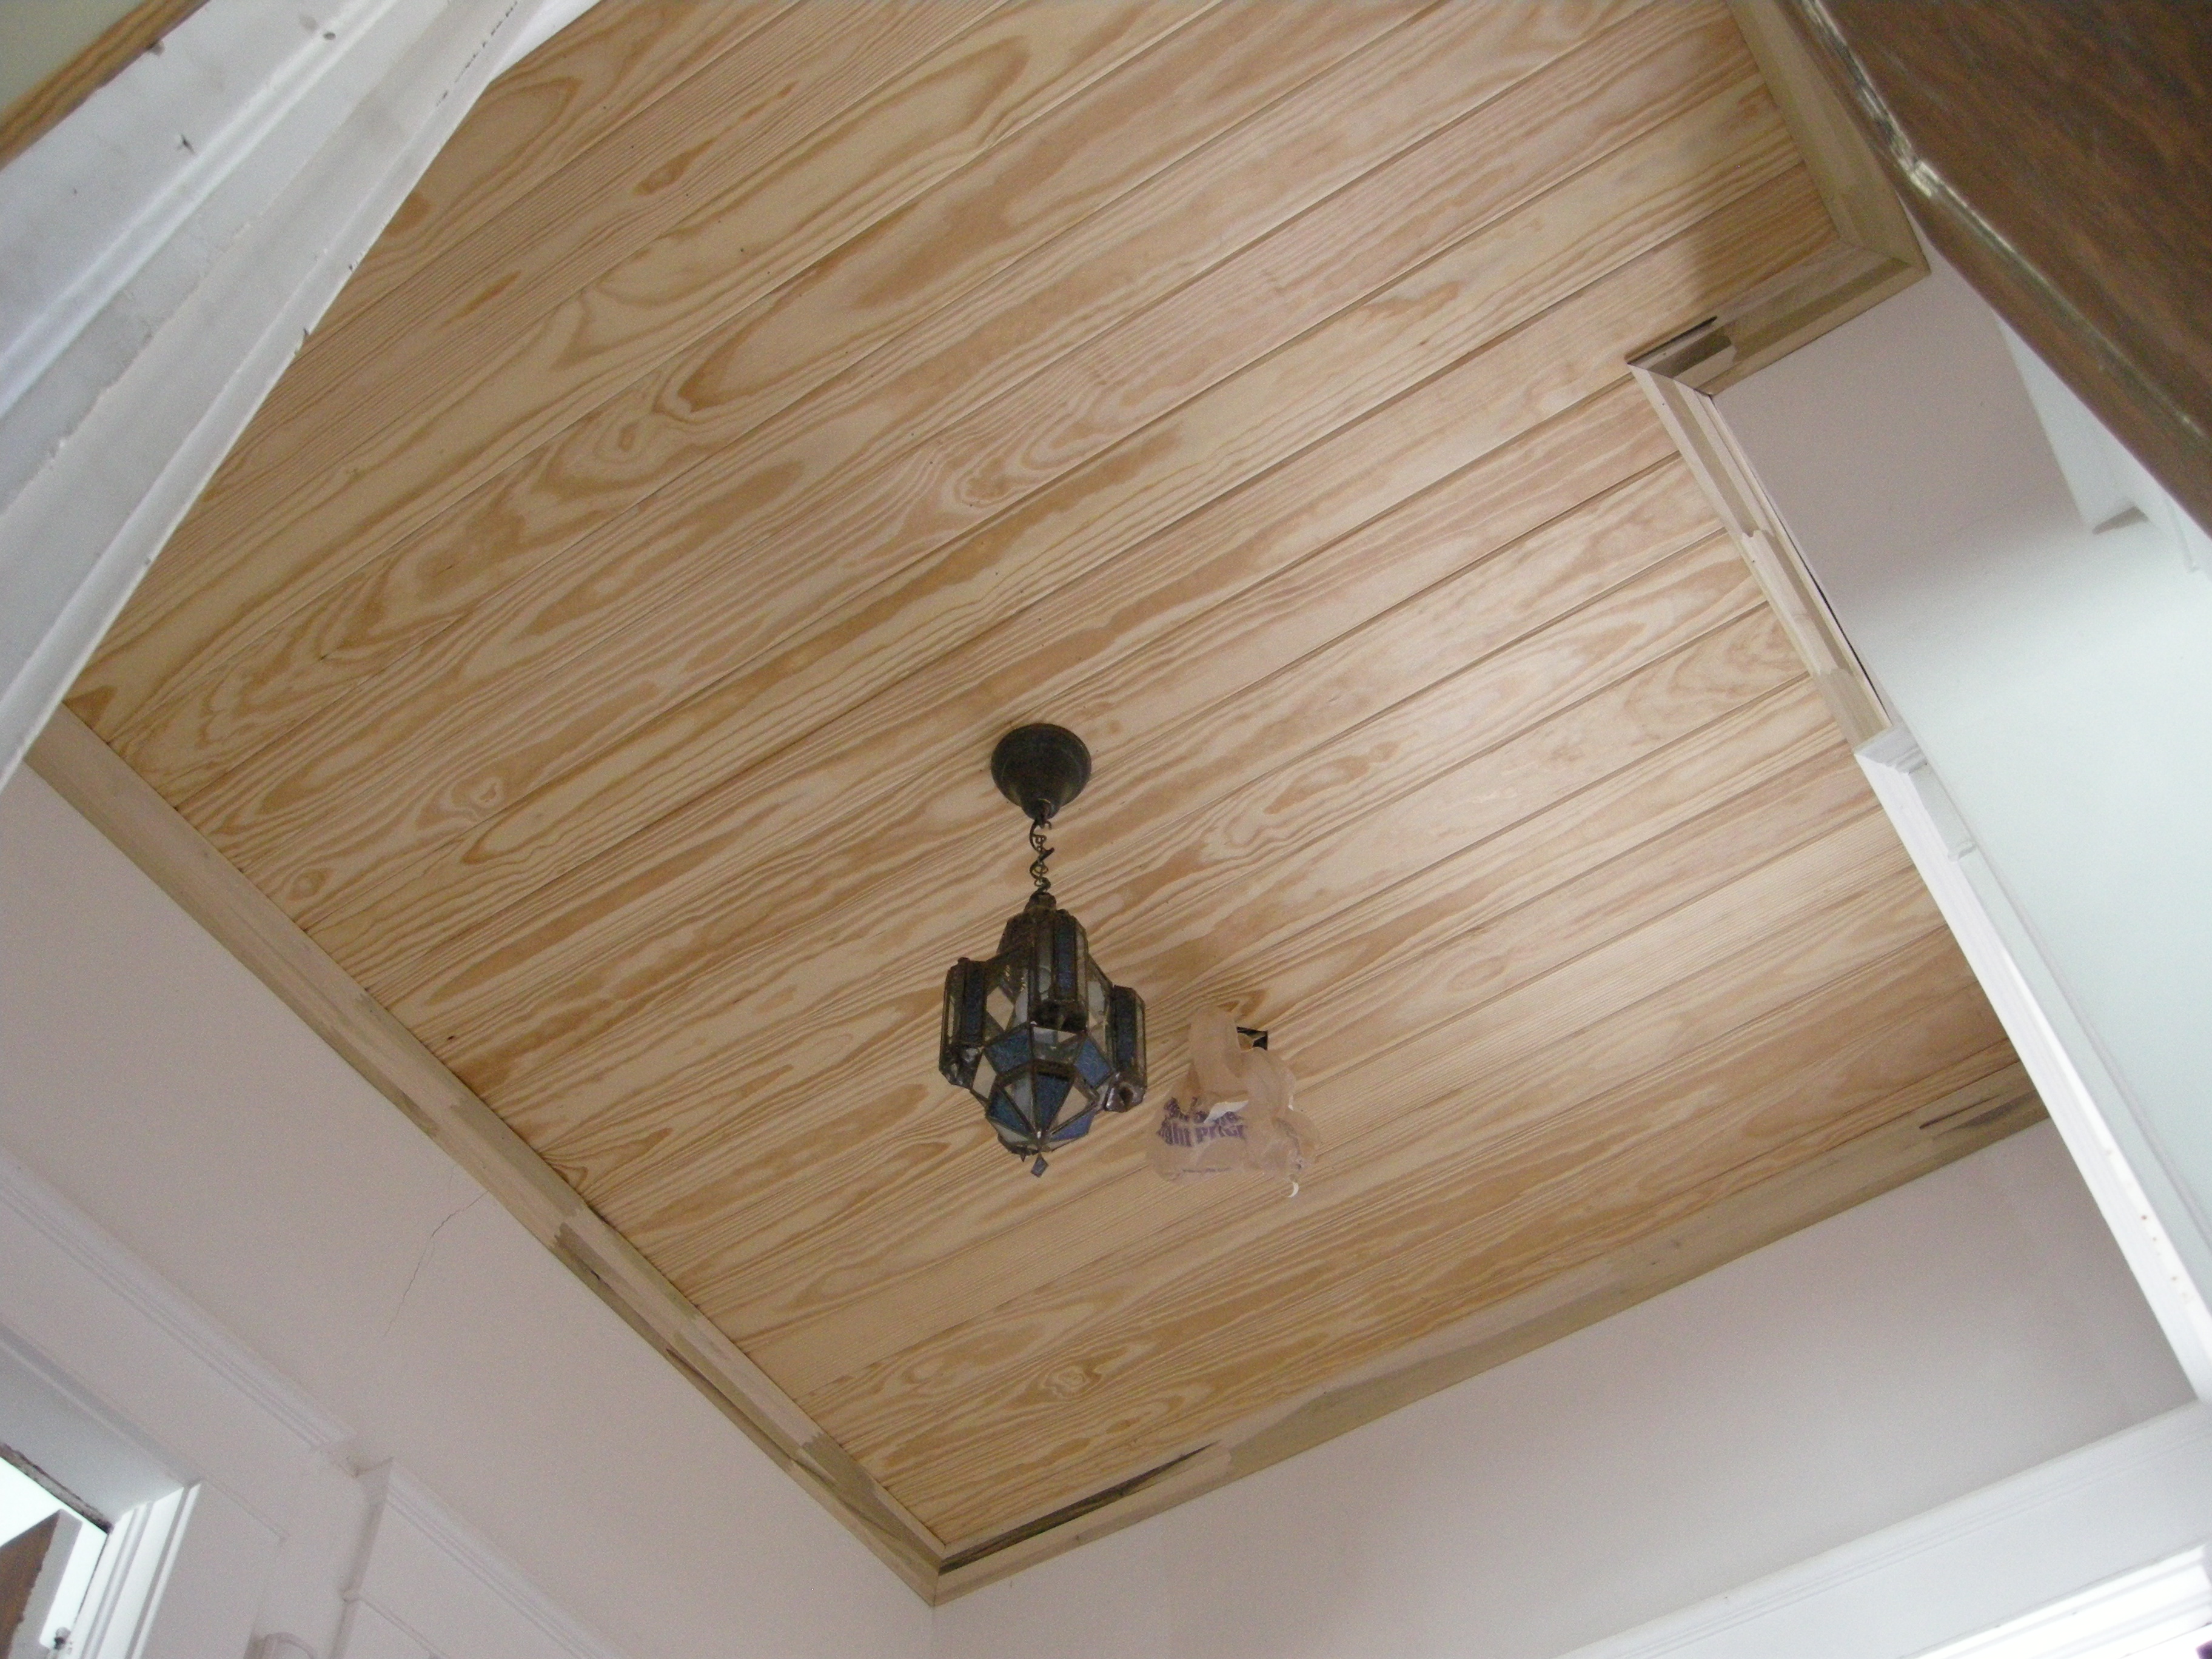
And here’s what it looked like when we finished the paneling.
Next up, some basic crown moulding around the edges. Back to Randall Brothers for our favorite cove moulding. It’s simple moulding, and it was original to the house in various places.
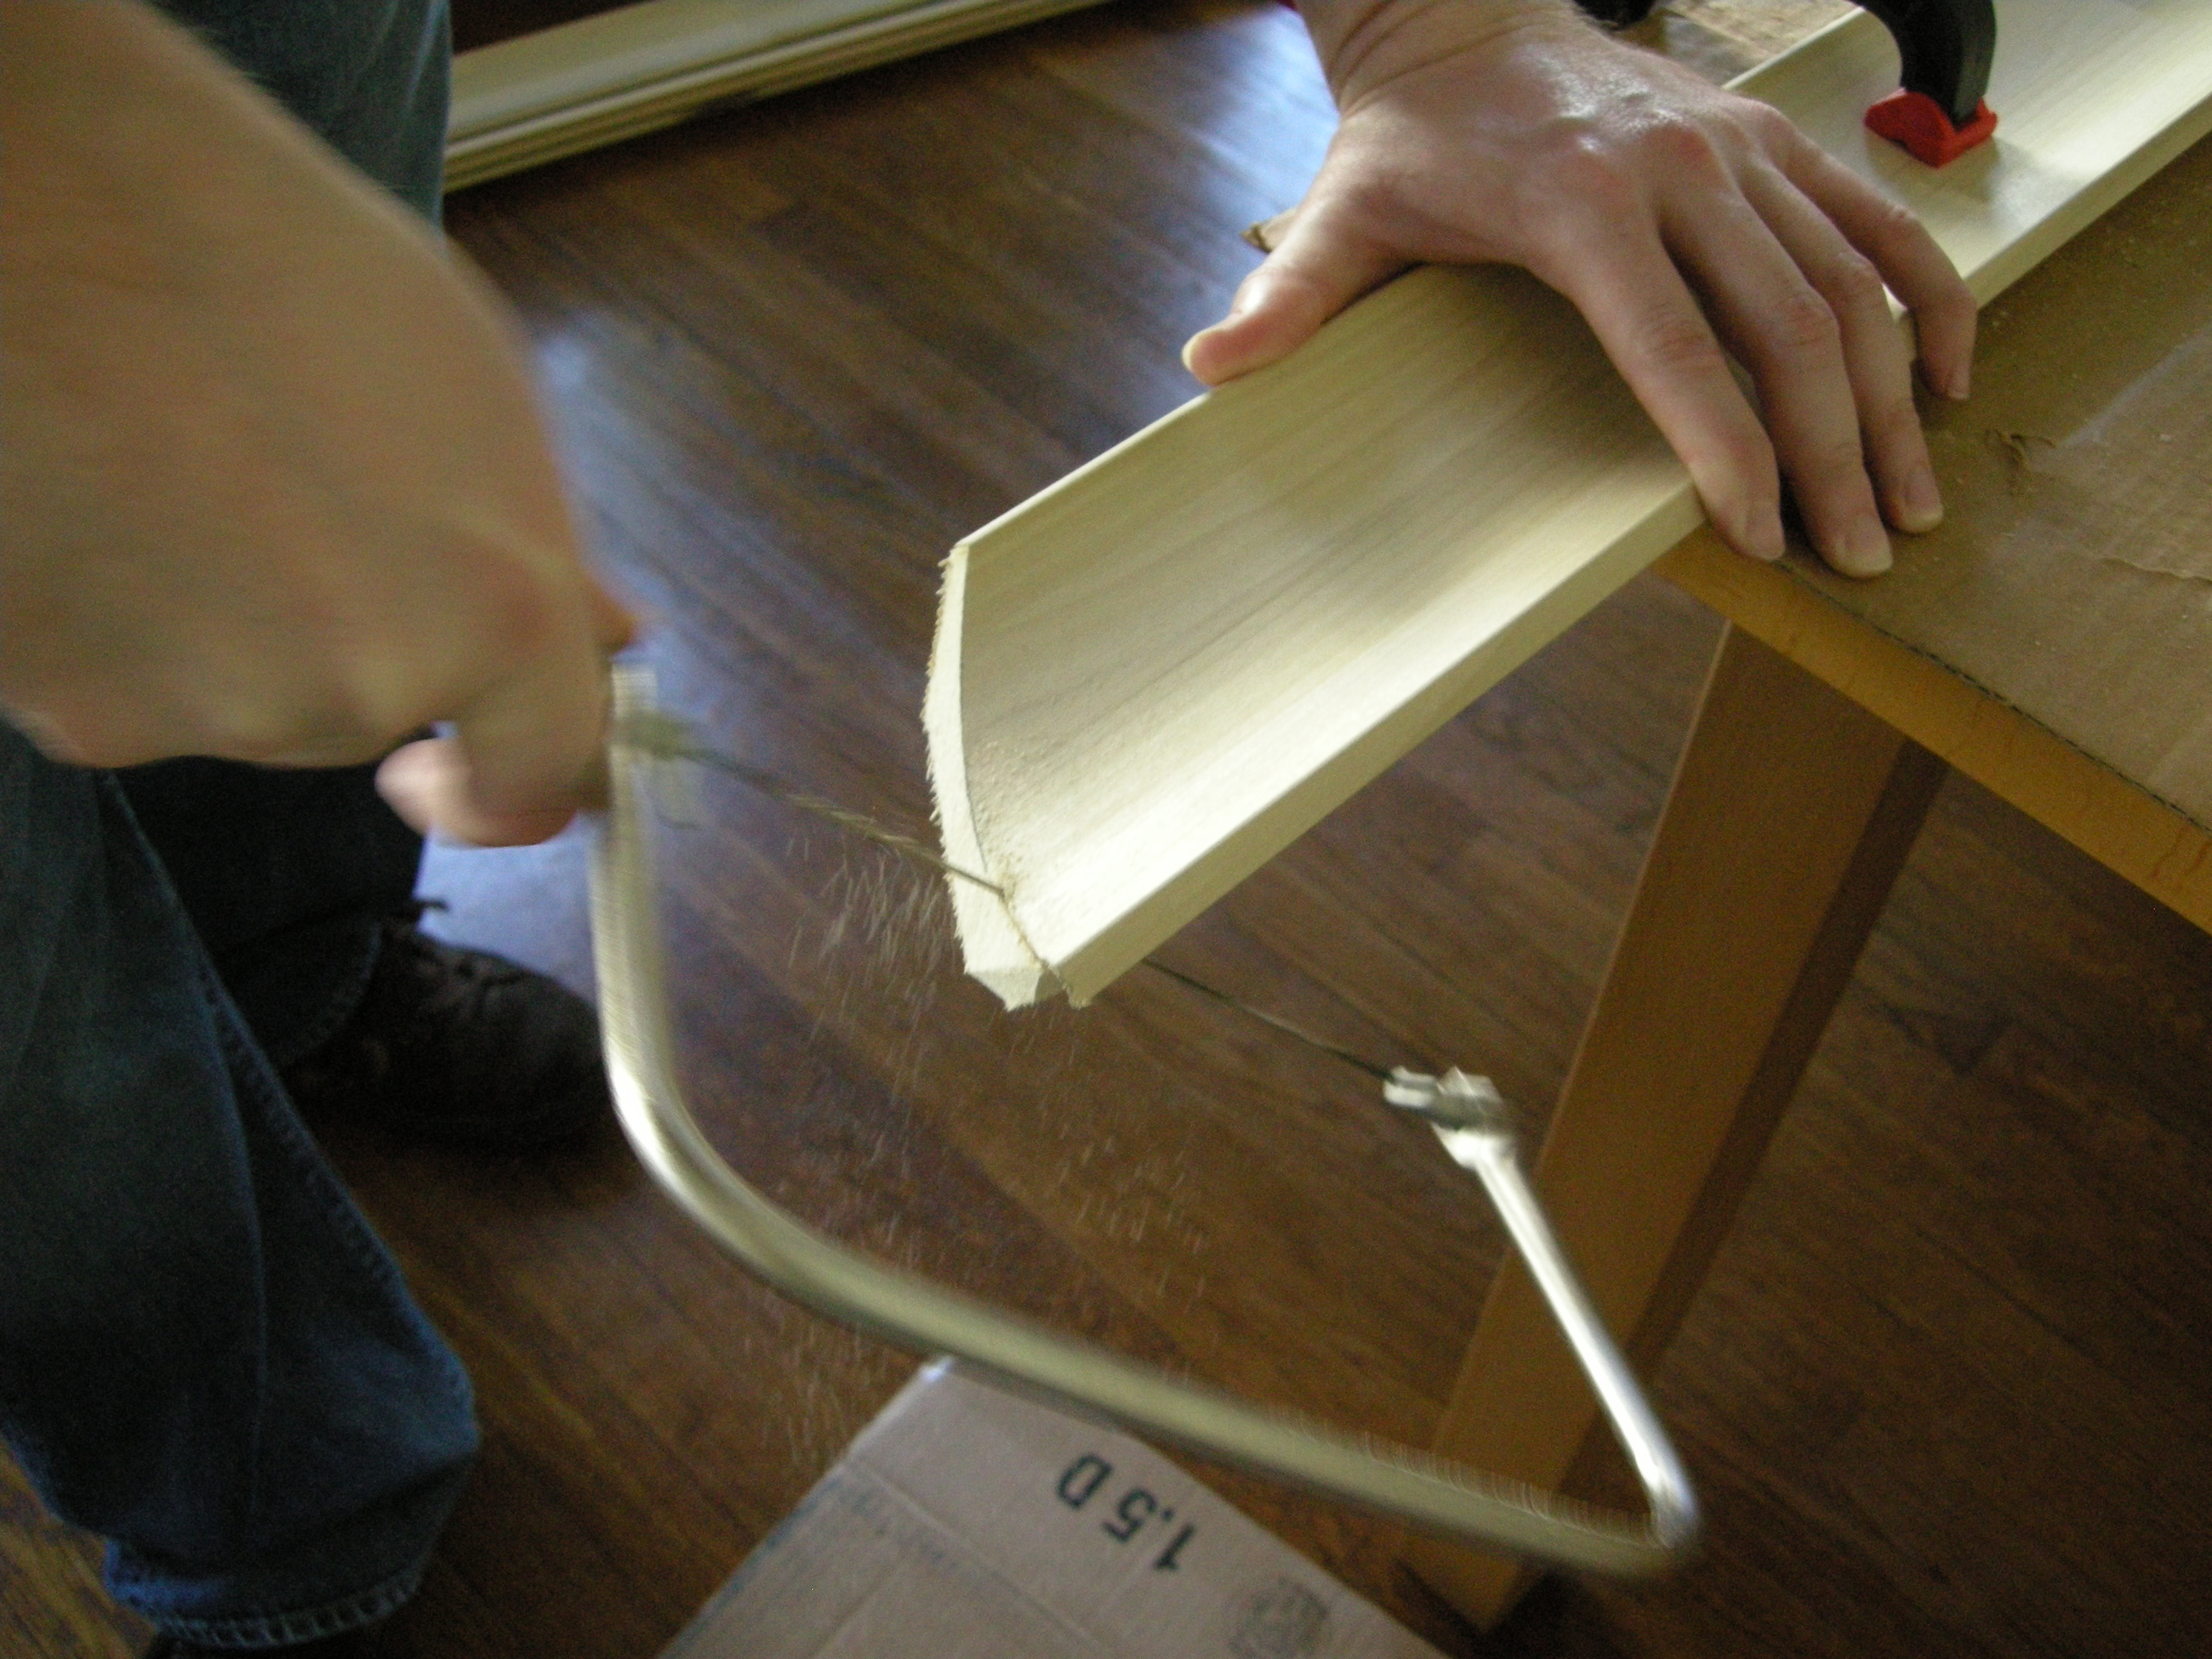
We started off with the easy pieces. Butt cuts and miter cuts. No real explanation needed other than always cut with the ceiling side on the bottom of the miter box. Yes, I cut these all by hand with a miter box. Got to stick with the historic handmade process of the house.
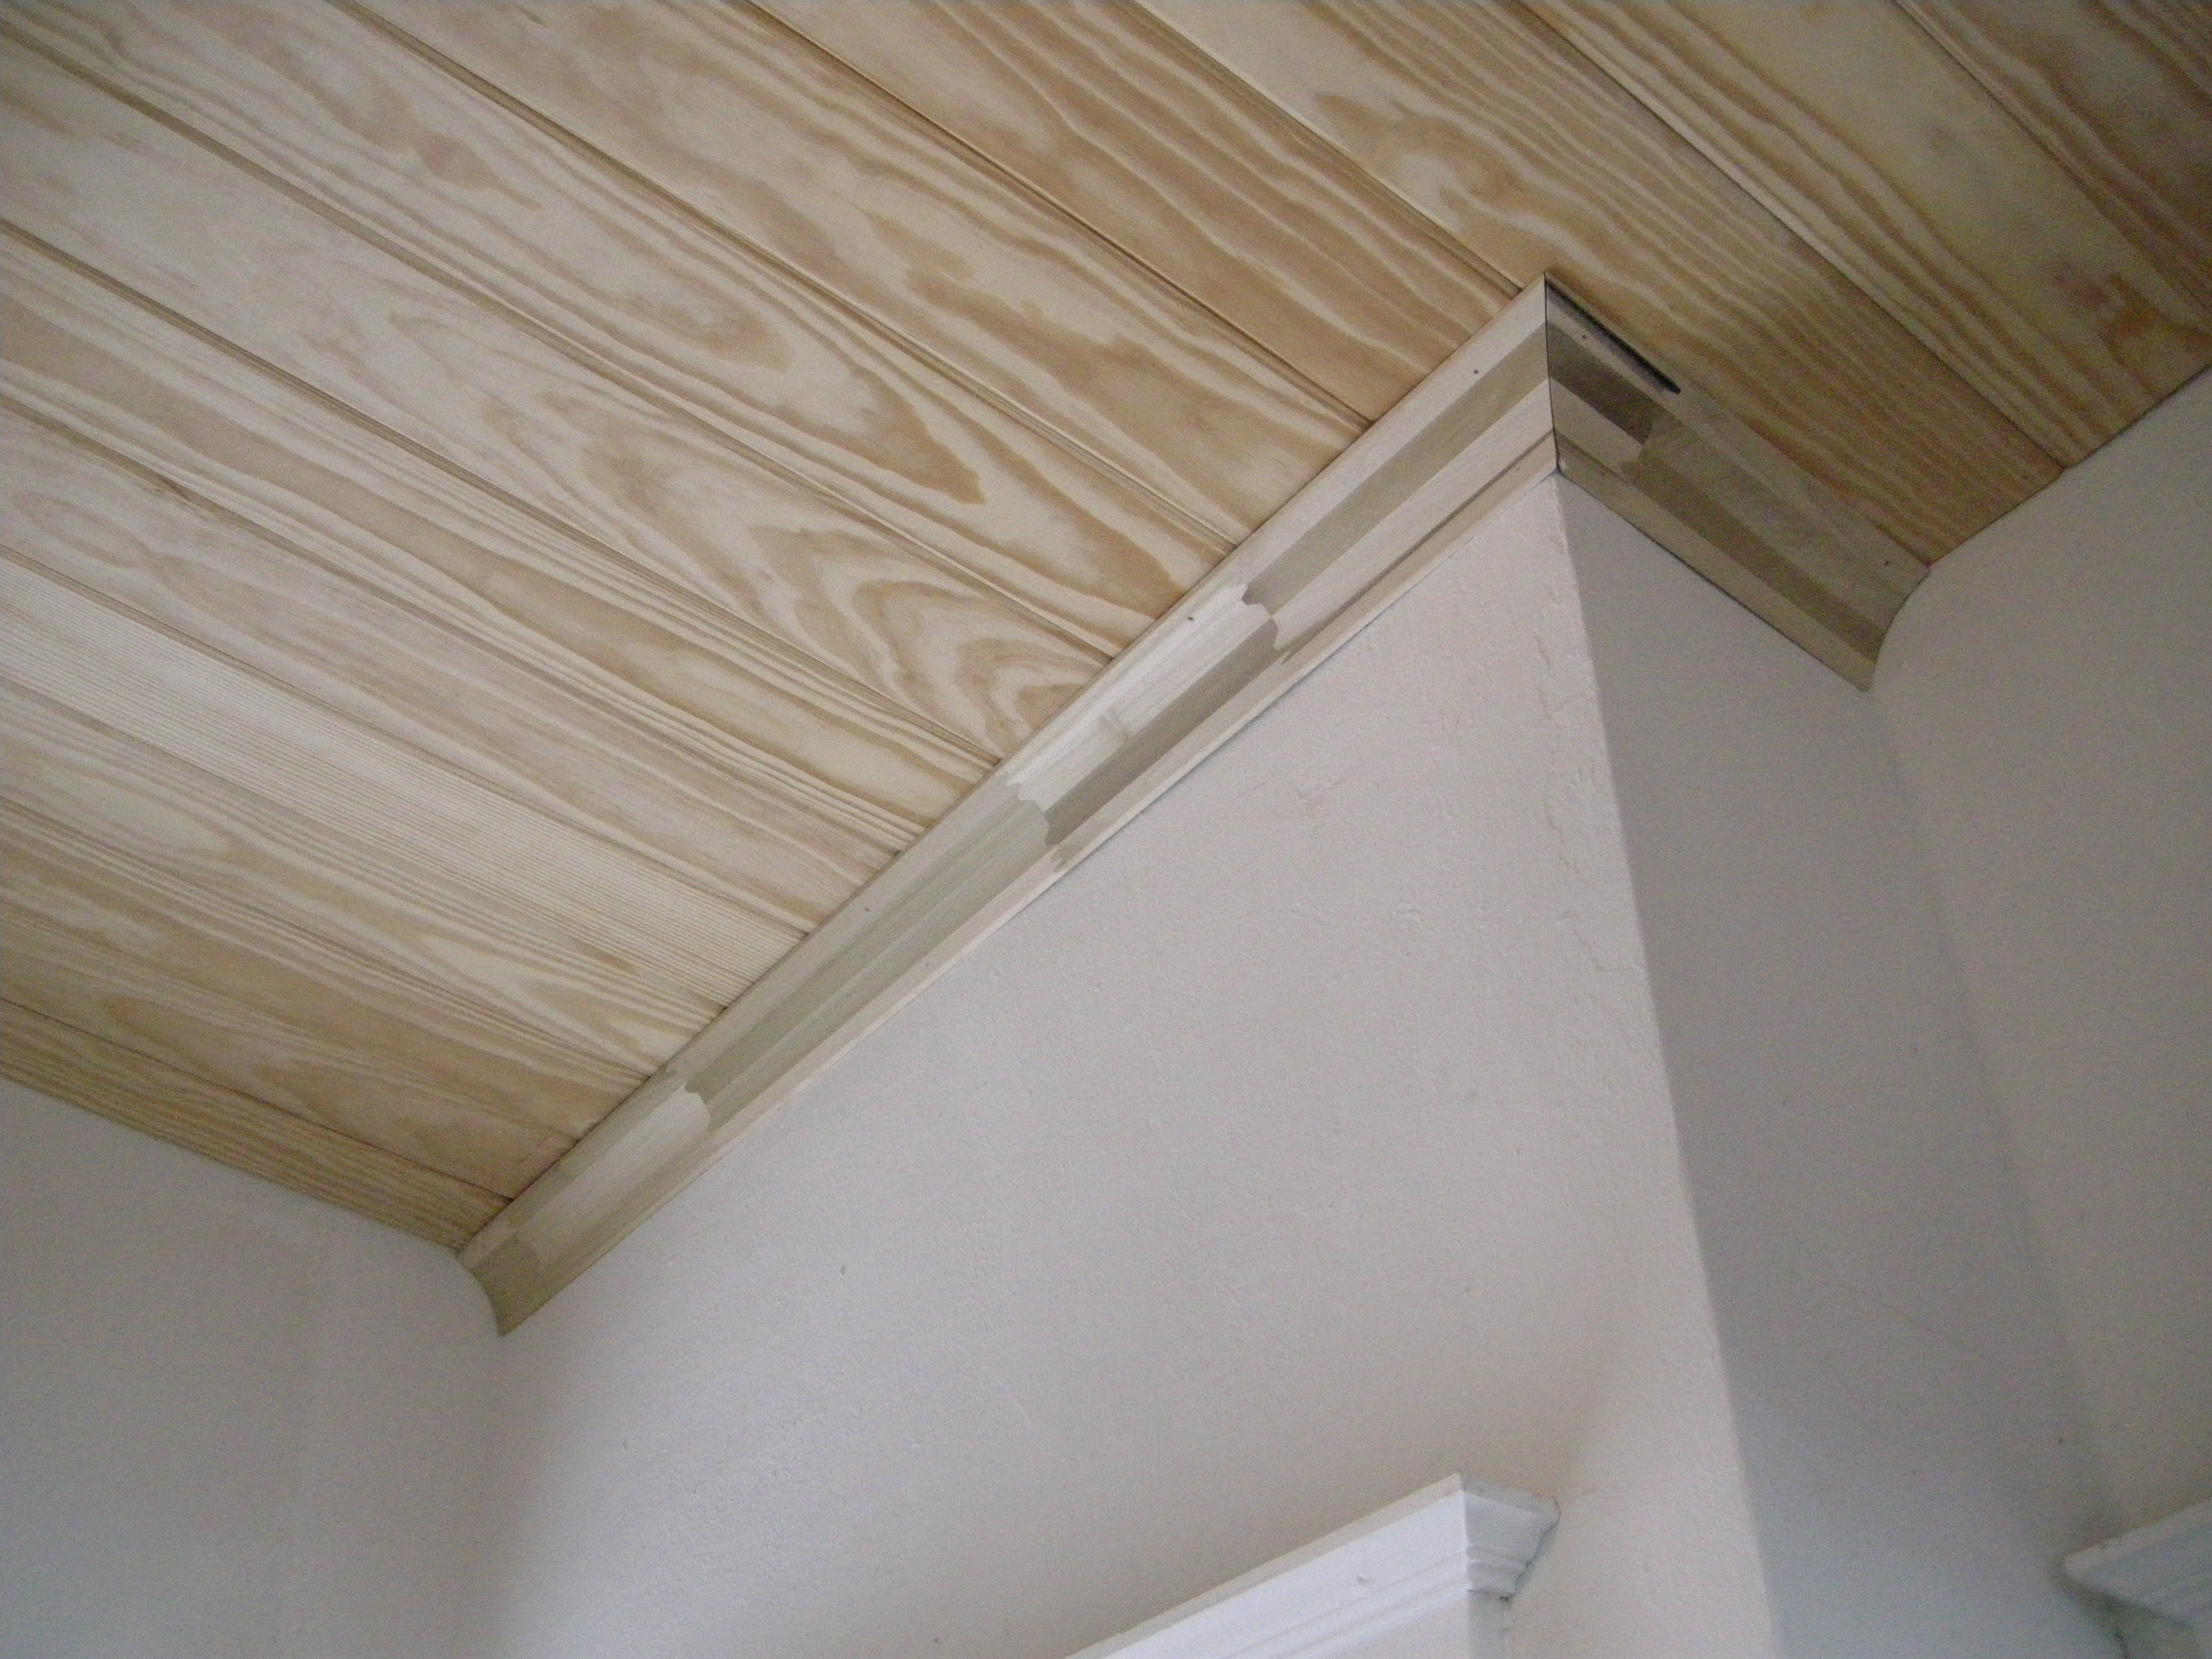
The next pieces of moulding require a cope joint. This is a much more challenging cut. First you have to miter and then you have to cope. I’m not going to explain the process because this awesome YouTube video (that I watched over and over) does a good job at showing you how to do it: http://www.youtube.com/watch?v=9aeAVe3fEtw. I practiced a few times on a scrap piece of moulding until I understood the technique. It’s kind of abstract, but a little bit of practice goes a long ways.
Here’s the finished project. It only took us two weekends to complete. (The paint and caulk will come later.)
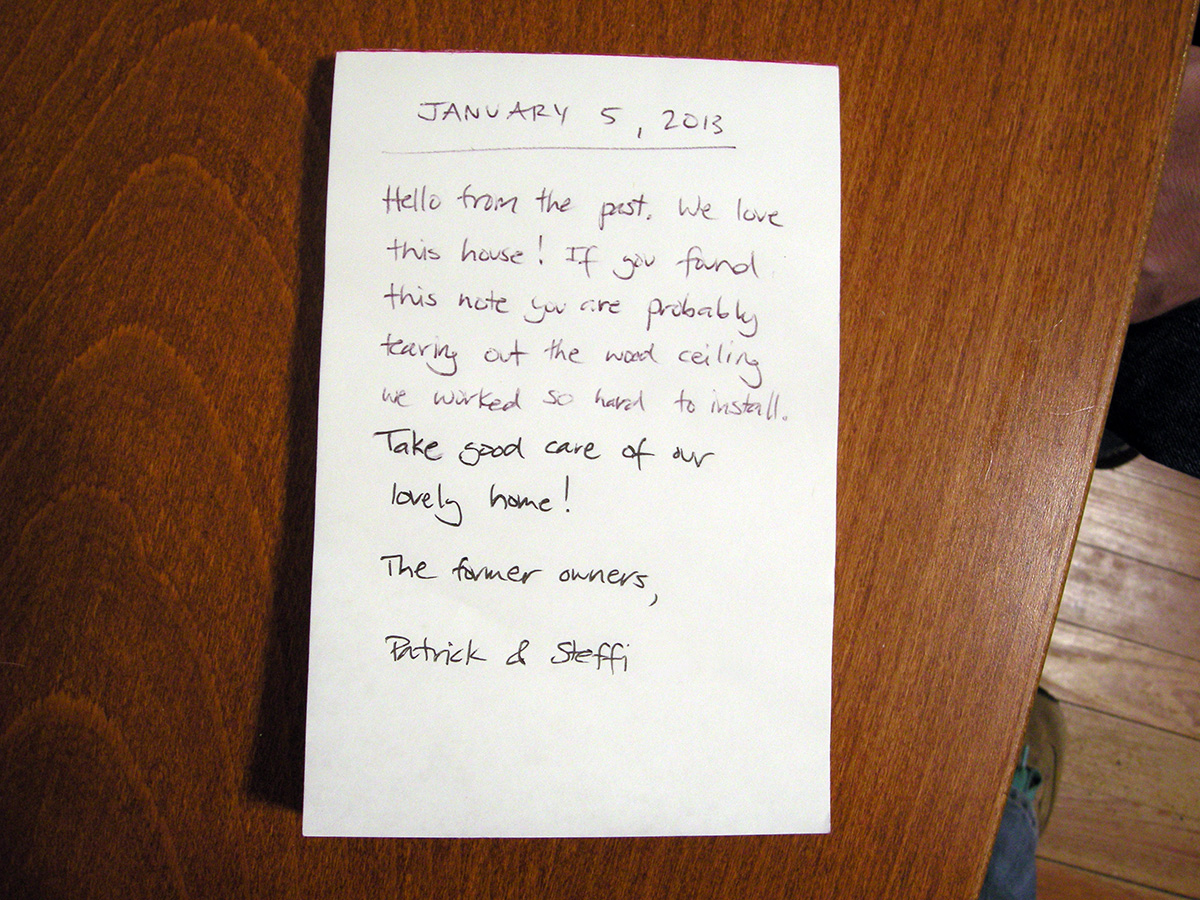
**EDIT: I forgot to add one image. We left a little note under the paneling for any future owners of our home.
1 Comment
Lisa and Robb
What a delightful note to the future!